60-years-of-experience

60+ Years of Experience

satisfaction-guarantee

Satisfaction Guarantee

short-lead-times

Short Lead Times

Safety Warning Labels for Businesses and Why You Need Them

Owning your own business isn’t without its benefits. Unfortunately, it also has its downsides as well. A good example of this is the hazards that exist within practically every business environment.

Naturally, you want to protect your business, employees, and visitors from injury while they are on your premises. Minimize the impact of these hazards by using safety warning labels and warning decals wherever caution should be exercised.

warning labels

Common Types of Safety Warning Labels and Their Uses

Safety warning labels are essential across various industries to ensure safety and compliance. Different types of labels serve specific purposes, providing crucial information to workers, consumers, and the general public. Below are some common types of safety warning labels and their applications.

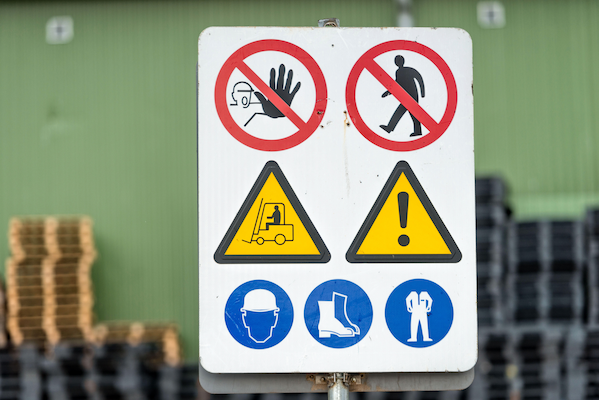
1. Industrial Safety Labels (Workplaces & Factories)

These labels are used in industrial settings like factories and construction sites to enhance workplace safety. They help workers follow proper procedures and protective measures.

These types of labels should be placed so that they are easily seen by anyone who is either using the equipment or even just walking past it. It should also be noted that these labels should be able to withstand wear and tear.
Examples of Industrial Labels
Industry warning labels should be on any equipment that is heavy, mechanical, electrical, or has the potential to give off heat.

  • Machine Safety Labels – Warn about potential machine hazards and operating guidelines.
  • Chemical Hazard Labels – Indicate dangers of chemical exposure and safe handling procedures.
  • High-Temperature Labels – Mark areas or equipment with heat risks.
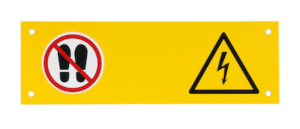
  • Electrical Safety Labels – Highlight risks of electric shock and proper equipment usage.
  • Heavy Lifting Labels – Provide guidance on safe lifting techniques and weight limits.

It is important that any machinery with even the slightest chance of harming someone be labeled as a potential hazard.

2. Fire Safety Labels (Public Buildings)

These labels are found in places like malls and hospitals, guiding people toward fire extinguishers, emergency exits, and evacuation routes.

Fire safety labels are an important part of any business’s fire prevention equipment. These should feature not only type but also directional devices so that people understand where the exits are.

It is also important that you ensure that these signs are created with the requirements of your local fire authority in mind.

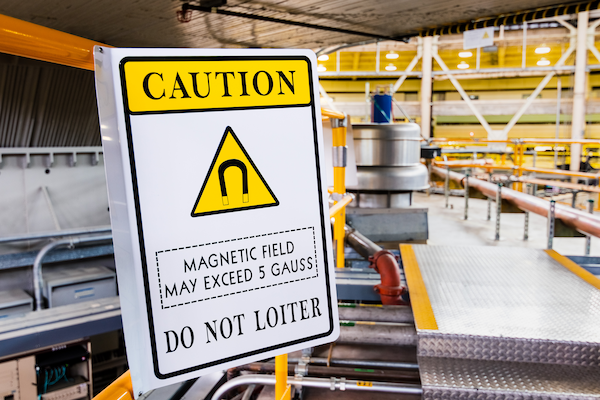
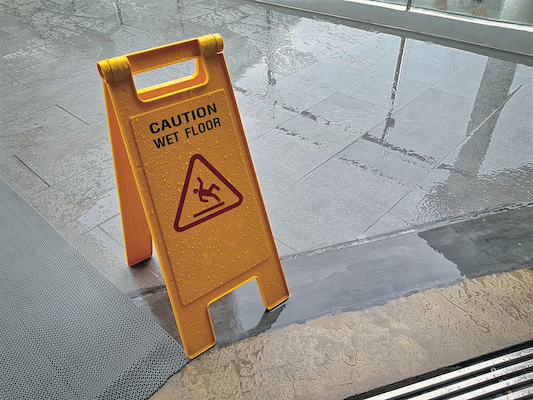
3. Caution Labels (Public Buildings)

This type of safety warning label warns people of common hazards that might exist in and around your property such as wet floors, icy patches, closing doors, and more. Caution labels also enforce safety regulations, such as no-parking zones in emergency lanes.

Warning labels should always be designed in such a way that they are very noticeable, with large and brightly colored text.

4. Healthcare & First Aid Labels (Medical Facilities & Public Areas)

Healthcare and first aid labels are crucial for maintaining safety in medical facilities, laboratories, and public areas. These labels help protect healthcare workers, patients, and visitors from potential hazards while ensuring that emergency resources are easily accessible.

Examples of Medical Labels

Hospitals and laboratories use safety labels to warn about biological hazards, radiation, and other risks.

  • Biological Hazard Labels – Warn about biohazardous materials, such as bloodborne pathogens, infectious waste, and medical specimens.
  • Radiation Warning Labels – Designate areas where exposure to radiation may occur, such as X-ray rooms and MRI scanning areas.
  • Sterile Equipment Labels – Indicate if an item has been sterilized or needs to be reprocessed.
  • Emergency Equipment Labels – Show the locations of first aid kits, automated external defibrillators (AEDs), eyewash stations, and emergency contact points.
  • Sharps Disposal Labels – These labels instruct on the proper disposal of needles, syringes, and other sharp objects to prevent accidental injuries and contamination.

By clearly marking hazards and emergency equipment, these labels help maintain a safe environment for both healthcare professionals and the general public.

5. Transportation Warning Labels (Shipping & Logistics)

Transportation warning labels are essential for ensuring the safe handling and movement of goods, particularly hazardous and flammable materials. They provide critical information about the contents of shipments, helping workers, drivers, and emergency responders take appropriate precautions.

6. Product Warning Labels (Consumer Goods)

Common in industries like food, personal care, and electronics, these labels provide safety instructions, ingredient details, and hazard warnings. For example, food labels display allergen information, while toy labels specify age recommendations and safety precautions.

Each type of safety label plays a crucial role in preventing accidents, ensuring compliance, and protecting workers and consumers.

warning label

Purposes of Safety Labels

Safety labels serve multiple crucial functions in workplaces, public spaces, and consumer products. Beyond simply warning individuals of potential hazards, these labels help businesses maintain compliance, improve emergency response, and enhance workplace safety.

Reduce Accidents and Injuries

Whether a person is working in a given area or is simply a visitor, they should be aware that the potential for harm is present. Obviously, the better the signage is, the better the chances are that they will be seen and danger averted.
By minimizing risks, businesses can also reduce liability concerns, including:

  • Lower worker’s compensation claims
  • Fewer legal disputes and lawsuits
  • Enhanced reputation for workplace safety

Clear, well-placed signage helps individuals recognize and avoid dangers, contributing to a safer environment.

Ensure Compliance

Warning labels and safety decals are required by OSHA. As a result, you should always label appropriate hazards in order to stay in compliance with local, state, and national requirements.

For example, if your firm manufactures and/or ships hazardous materials, it would be required that their presence is announced with safety labels to all employees and others who might be in the vicinity. This will help to remind employees and others to avoid certain areas or to use appropriate safety protective gear.

Locate Safety Equipment Quickly

What good is having a fire extinguisher and other safety equipment if you can’t readily find it? A safety label can make everyone aware of the location of a piece of equipment that might otherwise be overlooked in the event of an emergency.

Safety labels are also a good way to make sure that people who might be required to use equipment know how to do so appropriately. These types of labels are also a cost-effective way to better organize your business.

Provide Equipment Use and Handling Instructions

Safety labels go beyond warnings—they also educate users on proper equipment operation. Labels on industrial machinery, electrical panels, and chemical containers ensure:

  • Proper usage of tools and machines
  • Prevention of misuse or accidental injuries
  • Safe handling and disposal of hazardous materials

For example, labels on forklifts remind operators to use seat belts, while chemical containers include instructions on handling and spill response.

Assist With Training and Orientation

Having safety labels is an excellent way to make new employees and others aware of where safety equipment is located and how it is used to its greatest advantage. This is especially important for someone who might not be familiar with the dangers of your business areas.

Whenever employees, guests, and others are on your property, you should make every effort to make sure that they are safe and know how to protect themselves when there is an emergency. Safety labels that are correctly made and appropriately placed are excellent for this purpose.

warning label

6 Steps for Designing Efficient Safety Warning Labels

When designing your safety label, you should always make sure that your safety labels are brightly colored, have a type that is easily readable, and can be understood by anyone who might be reading them.

This includes others who might be on your premises who might not speak English or better understand warnings in their own language. This will significantly reduce the risk of accident or injury on your premises.

Each step of the design process is important to creating efficient labels that suit your business’s needs.

1. Choose Dimensions

The size of your safety label is an essential factor that determines its visibility and readability. When selecting dimensions, consider the following:

  • Viewing Distance – Larger labels are necessary for hazards that must be seen from afar, while smaller labels may work for equipment or localized warnings.
  • Placement – Will the label be placed on machinery, walls, floors, or entrances? The available space will impact its size.
  • Regulatory Requirements – Some industries have specific size requirements for safety labels. OSHA, ANSI, and other regulatory bodies often provide guidelines for minimum label dimensions.

2. Select Material

Safety labels are exposed to different environmental conditions, so selecting the right material is crucial for durability and effectiveness. Some common material options include:

  • Vinyl – A flexible and durable material resistant to moisture, chemicals, and general wear and tear. Ideal for both indoor and outdoor applications.
  • Polyester – Highly durable and resistant to UV light, chemicals, and extreme temperatures. Often used in harsh industrial settings.
  • Aluminum – Best for permanent safety signage in outdoor or industrial environments where corrosion resistance is needed.
  • Polycarbonate – A high-strength material often used for equipment labels that require durability and resistance to abrasions.

Consider factors like exposure to chemicals, moisture, sunlight, and temperature variations when choosing your material.

3. Specify Signal Word

Signal words help to immediately convey the severity of a hazard. The three primary signal words defined by ANSI and OSHA are:

  • “DANGER” – Used for the most severe hazards that, if not avoided, will result in serious injury or death. Typically displayed in red.
  • “WARNING” – Indicates a hazardous situation that could result in injury or death. Displayed in orange.
  • “CAUTION” – Used for hazards that may cause minor to moderate injuries if not avoided. Displayed in yellow.

Choosing the right signal word ensures that employees and visitors immediately recognize the level of risk involved.

4. Write Word Message Panel Text

The message panel text should clearly communicate the specific hazard and the actions that should be taken to avoid it. A well-written message should:

Be Concise

Safety warning labels need to convey their message quickly and efficiently. You don’t have much space, so it’s crucial to use short, direct sentences that get straight to the point.

Avoid long explanations or unnecessary details that could confuse or distract the reader. The goal is for someone to quickly read the label, understand the hazard, and know how to respond.

Be Action-Oriented

Effective safety labels don’t just highlight the danger—they also tell the reader what actions they should take to prevent injury or damage. Action-oriented language is clear and direct.

Use imperative verbs to convey urgency and ensure that the reader knows exactly what to do.

Example: “Wear protective gloves” or “Keep hands clear of moving parts.”

Avoid Technical Jargon

Not all employees or visitors to your business will have specialized knowledge about the hazards present, so it’s essential that the text is understandable by everyone. Avoid using technical or industry-specific terms that could confuse or mislead someone.

Write the message as simply and directly as possible to make sure the hazard is communicated effectively.

Include Consequences

If the hazard poses serious risks, it’s important to clearly state what could happen if the warning is ignored. This helps the reader understand the gravity of the situation and reinforces the need for caution.

Be direct about the potential consequences of not following safety protocols.

Example: “Risk of electric shock – serious injury or death may occur.”

Consider Multilingual Labels

If your business employs workers who speak different languages, it’s important to consider multilingual labels to ensure everyone can understand the safety warnings. This is especially true in diverse workplaces where a language barrier could impede understanding.

Ensure that safety labels are not only translated accurately but are also culturally appropriate.


5. Use Pictogram

A pictogram is a visual symbol that enhances the effectiveness of a safety label by making the warning easily recognizable, even for those who may not speak the primary language of the workplace.
Using pictograms improves hazard communication, reduces misinterpretation, and increases compliance with workplace safety standards.

Clarity

The pictogram should be simple, clear, and easy to recognize. Overly complex or detailed images can reduce effectiveness and may confuse.
The goal is to ensure that the symbol conveys the hazard instantly, even from a distance.

Compliance

Many regulatory bodies require specific pictograms for certain types of hazards. Ensuring that your labels comply with safety regulations such as OSHA, ANSI, and GHS will help you avoid fines and improve workplace safety.

Example: flammable, corrosive, and toxic substances

Contrast

For maximum visibility, the pictogram should stand out clearly against the background of the label. High contrast between the image and background ensures that the symbol remains noticeable even in low-light or high-activity environments.

Placement

The position of the pictogram on the label matters. It should be placed near the signal word (such as “Danger” or “Caution”) and close to the message panel to reinforce the warning message.
Proper placement ensures that workers immediately associate the image with the specific hazard and safety instructions.

6. Decide If You Need An Identifier

In some cases, labels must include an identifier, which is a unique code or number used to classify hazardous chemicals or substances. This step is particularly important for:

  • Chemical Safety Labels – OSHA’s Hazard Communication Standard (HCS) and the Globally Harmonized System (GHS) require specific chemical identifiers.
  • Manufacturing and Warehousing – Large facilities may use numbering systems to track hazardous materials.
  • ISO and ANSI Compliance – Some industries require hazard identifiers to meet international labeling standards.

While not all safety warning labels need an identifier, including one can help with compliance and inventory management.

Once you have finished designing your safety label, a manufacturer can begin the printing process.

manufacturer

How To Choose the Right Safety Warning Label Manufacturers

While it may seem simple to design and print labels in-house, professional manufacturers offer access to better materials, advanced printing technology, and regulatory expertise.

Choosing the right safety label manufacturer ensures your business remains compliant and that your labels remain durable, legible, and effective over time.

1. Industry Standards Knowledge

A reliable safety label manufacturer should have a deep understanding of regulatory requirements, including:

  • ANSI (American National Standards Institute) – Establishes standardized formats for safety labels, including color codes, signal words, and pictograms.
  • ISO (International Organization for Standardization) – Defines global safety symbols and best practices for hazard communication.
  • UL (Underwriters Laboratories) – Certifies labels for performance, durability, and resistance to environmental factors like heat, chemicals, and abrasion.
  • OSHA (Occupational Safety and Health Administration) – Ensures that workplace safety labels meet federal hazard communication standards.

Working with a manufacturer that understands these regulations ensures your labels meet legal requirements and provide clear, consistent safety messaging. Always ask about their compliance expertise and whether they offer guidance on regulatory updates.

2. Experience in Your Industry

Different industries have unique safety labeling needs. A manufacturer with experience in your specific field will better understand the challenges and requirements associated with your products and work environment. Consider the following:

  • Manufacturing & Industrial Setting – Requires durable, heat- and chemical-resistant labels to withstand harsh environments.
  • Medical & Healthcare – Demands high-visibility warning labels that meet FDA or HIPAA compliance.
  • Electronics & Electrical Equipment – Needs labels with strong adhesion and resistance to solvents or extreme temperatures.
  • Construction & Heavy Equipment – Calls for high-durability labels with fade-resistant, weatherproof coatings.

When evaluating a manufacturer, ask for case studies or references from companies in your industry. This will help you determine whether they have the necessary expertise and a proven track record of delivering high-quality safety labels.

3. Quality of Materials & Printing Technology

The materials used for safety labels impact their longevity and effectiveness. High-quality labels should be resistant to moisture, chemicals, abrasion, and UV exposure to ensure they remain legible over time. Look for manufacturers that offer:

  • Durable Materials – Polyester, vinyl, and laminate options that can withstand extreme conditions.
  • UV-Resistant Inks – Prevent fading and ensure long-term visibility in outdoor or high-light environments.
  • Adhesive Strength Options – Labels that adhere well to different surfaces, whether smooth, rough, or curved.
  • Eco-Friendly Production Methods – Consider manufacturers using sustainable materials, water-based inks, and recyclable label options.

Advanced printing technology, such as digital or screen printing, enhances the label’s durability and readability. Discuss available printing techniques with potential manufacturers to determine the best option for your needs.

4. Customization & Design Capabilities

Every business has unique safety labeling needs, so the ability to customize labels is crucial. Some manufacturers offer custom printing options, allowing businesses to add their branding, logos, QR codes, and industry-specific warnings.

Key customization factors to look for:

  • Multiple size and shape options to fit specific equipment, machinery, or surfaces.
  • Multilingual label printing for global or diverse workforces.
  • Reflective or glow-in-the-dark labels for improved visibility in low-light conditions.
  • Tamper-proof or destructible labels to prevent unauthorized removal.

A manufacturer that offers flexible design capabilities can help you create labels that not only meet compliance standards but also align with your company’s specific safety messaging.

5. Order Flexibility & Turnaround Time

Your business may need large bulk orders or small custom batches depending on your project or industry. Look for a manufacturer that offers flexible order quantities to meet your specific requirements. Additionally, fast turnaround times are crucial when replacing outdated or damaged labels.

  • Minimum order quantity (MOQ) – Can they accommodate small or one-time orders?
  • Lead times – How quickly can they produce and ship your labels?
  • Rush order availability – Do they offer expedited production for urgent needs?

A manufacturer with streamlined production and delivery processes ensures you get your safety labels when you need them—without unnecessary delays.

Mitigate Risk With Hallmark Nameplate

Want to protect your business and employees? Our expert designers and manufacturers can help you create safety labels for your business. We will walk you through the different options and give suggestions on what will best fit your needs.

Request a FREE quote today to get started!

The Basics of Printed Circuit Boards

At the core of nearly all electronic devices, there lies a printed circuit board (PCB). From simple household gadgets to complex industrial machines, these boards connect components to bring the devices to life.

Printed circuit boards serve as the backbone for countless electronic devices, ranging from smartphones and computers to medical equipment and automotive systems. Regardless of size, every electrically powered device relies on some form of PCB to function.

Whether it’s a cell phone, a remote control, a complex computer, or a simple child’s toy, a PCB provides connectivity between all of the components of a device. As a result, the device will function as it should.

So, join us as we explore the fundamentals of printed circuit boards. We’ll delve into their structure, their function, and unravel the mystery of how these boards operate.

Let’s begin!

how does a circuit board work

What Are PCBs?

At its core, a PCB is a flat board made of non-conductive material, typically fiberglass-reinforced epoxy laminate, with conductive pathways etched or printed onto its surface. Electrical components are soldered onto the PCB through either wave soldering or selective soldering. Then, a conformal coating is applied to protect the surface and secure its longevity.

The primary purpose of printed circuit boards is to provide a reliable platform for interconnecting electronic components compactly and efficiently. By guiding electrical signals through predefined pathways, PCBs ensure that electronic systems function with precision and reliability.

The History of PCBs

The origins of printed circuit boards can be traced back to the early 20th century. Before the invention of PCBs, electronic circuits were constructed using cumbersome and unreliable methods such as point-to-point wiring and terminal strips. These methods were labor-intensive and prone to errors and failures, so innovation was necessary.

Early Development

The concept of the printed wiring board, which became the modern PCB, emerged in the early 20th century. In 1925, Charles Ducas patented a method that used conductive foil patterns on an insulating board to connect electronic components, laying the foundation for PCBs.

World War II intensified the need for efficient electronic systems, leading Austrian engineer Paul Eisler to create the first true PCB in 1943. Eisler’s “printed wiring,” invention was used in proximity fuses for Allied anti-aircraft shells.

Evolution of Printed Circuit Boards

Following World War II, PCB technology continued to evolve rapidly. The introduction of new materials and manufacturing processes led to significant improvements in PCB design and performance.

1950s

One of the key milestones in the evolution of PCB technology was the development of the “through-hole” method in the 1950s. This method involved drilling holes in the PCB substrate and inserting component leads through the holes before soldering them in place. The through-hole method allowed for more secure connections and improved reliability compared to earlier methods.

1960s-1970s

In the 1960s and 1970s, the introduction of automated assembly techniques such as wave soldering and surface mount technology (SMT) revolutionized PCB manufacturing. Surface mount technology, in particular, allowed for smaller and lighter electronic devices by eliminating the need for bulky through-hole components.

1980s

The 1980s saw the widespread adoption of computer-aided design (CAD) software for PCB design, further enhancing the precision and complexity of PCB layouts. This era also saw the emergence of multi-layer PCBs, which allowed for denser component placement and improved signal integrity.

Recent Years

In recent years, advancements in science, manufacturing processes, and miniaturization techniques have continued to drive innovation in PCB technology. High-density interconnect (HDI) PCBs, flexible PCBs, and integrated passive devices (IPDs) are innovative advancements expanding printed circuit board capabilities.

As you can see, PCBs have played a vital role in shaping the modern world of electronics from its humble beginnings to modern cutting-edge technology. Now, let’s discuss the importance of these electronic boards in our modern world.

The Importance of PCBs in the Electronics Industry

electronics

PCBs are essential to the electronics industry, powering virtually every electronic device. Here’s why they’re indispensable:

1.) Compact PCB Design

One of the most remarkable aspects of PCBs is their ability to accommodate complex circuitry within a compact form. As devices become smaller and more powerful, PCBs allow engineers to pack an increasing number of components into limited spaces without compromising functionality. From sleek smartphones to wearable fitness trackers and autonomous vehicle control systems, PCBs enable miniaturization, pushing technological boundaries.

2.) Reliability

Unlike the fragile, hand-wired connections of early electronics, modern PCBs are engineered for durability and precision. Advanced manufacturing techniques ensure that each PCB is produced with exacting standards, reducing the risk of electrical failure. Their layered structure, reinforced with protective coatings, allows them to withstand extreme temperatures, vibrations, and moisture—making them indispensable in industries such as aerospace, healthcare, and industrial automation.

3.) Ease of Assembly

PCBs streamline the production process, eliminating the complexities of manual wiring and drastically reducing the risk of human error. Through automated assembly techniques like surface-mount technology (SMT) and wave soldering, manufacturers can produce electronics faster, more accurately, and at a lower cost. This efficiency is crucial for mass production, ensuring that devices are built quickly while maintaining high quality.

4.) Scalability

PCBs provide a flexible foundation that can be scaled for any application. Whether designing a one-off prototype or manufacturing millions of units, PCBs can be customized to different shapes, sizes, and functionalities. Engineers can develop multilayered boards for high-performance computing or flexible PCBs that bend to fit wearable technology. This scalability ensures that PCBs evolve alongside the needs of emerging industries.

5.) Driving Innovation

PCBs don’t just power today’s electronics—they shape the future of technology. Engineers and product designers rely on PCBs to develop cutting-edge innovations, from quantum computing to next-generation medical implants. With advancements in materials, 3D-printed PCBs, and integrated smart technologies, the possibilities for what PCBs can enable are virtually limitless.

How Does a Printed Circuit Board Work?

Now that we have some background on PCBs, let’s dig deeper. PCBs might seem simple, but they’re crucial in directing electricity to power a device. These boards use layers of resin and soldered pathways to guide electrical signals, connecting all components and allowing the device to operate as intended.

Beyond powering the device, PCBs also provide a sturdy foundation for all components to attach. This makes them essential for both structure and function. In many ways, they’re the “brains” behind electronic devices.

So, let’s take a look at the components of a printed circuit board.

Components of a Printed Circuit Board

Understanding the components of a PCB is crucial for designing and manufacturing reliable electronic devices. By selecting the appropriate substrate materials, conductive layers, and solder mask materials, engineers and manufacturers can ensure the performance, reliability, and longevity of the final product.

Most PCBs contain the following components:

Transistor

A transistor is a semiconductor device used to amplify or switch electronic signals and electrical power. It is one of the fundamental building blocks of modern electronics and plays a critical role in PCBs.

Resistor

Resistors are passive electrical components that limit or regulate current flow within a circuit. They are essential for ensuring that other components receive the appropriate amount of power without damage.

Capacitors

Capacitors store electrical energy temporarily and release it when needed. They help smooth out voltage fluctuations and improve power stability in circuits.

Inductors

Inductors are passive components that store energy in a magnetic field when electrical currents flow through them. They are commonly used in power supplies and filters.

Diodes

Diodes are semiconductor devices that allow electrical currents to flow in one direction while blocking it in the opposite direction. This makes them crucial for rectification and signal protection.

Sensor

Sensors allow a PCB to interact with the environment by detecting changes in temperature, light, motion, pressure, and more. They convert these physical inputs into electrical signals that a microcontroller can process.

Transformer

Transformers adjust voltage levels by either increasing (step-up) or decreasing (step-down) electrical energy. They are essential for power regulation and isolation.

Key Considerations When Creating PCB”

Substrate Materials

Printed circuit boards (PCBs) use various substrate materials, which form the board’s base and support the components. The choice of substrate depends on factors such as the application, operating conditions, and cost. Some common types of substrate materials include:

  • FR-4: One of the most common substrate materials is FR-4, a fiberglass-reinforced epoxy laminate known for its electrical insulation, mechanical strength, and flame resistance.
  • Flex: On the other hand, flex PCBs, made from flexible materials like polyimide or polyester, can bend to fit specific shapes and are ideal for applications like wearable devices and medical implants.

Conductive

Conductive layers are the metallic pathways on a PCB that provide electrical connectivity between components. These pathways are typically made of copper and are deposited onto the substrate using various techniques. Two key components of the conductive layers are:

  • Copper Foil: Copper foil forms the conductive pathways on a PCB, and manufacturers typically laminate it onto the substrate using heat and pressure. This forms a thin copper layer that follows the desired circuit pattern, selected for its excellent conductivity and ease of fabrication.
  • Copper Plating: Additionally, copper plating is applied to the walls of plated through-holes or vias to ensure electrical continuity between layers. This plating strengthens connections and is achieved through electroplating, where copper ions are deposited onto exposed surfaces of the PCB.

Solder Mask

The solder mask is a protective layer applied to the surface of the PCB, covering the conductive traces and pads while leaving the soldering areas exposed. It serves several important purposes:

  • Purpose: The primary purpose of the solder mask is to prevent unintended electrical connections between adjacent traces or components during soldering. By covering non-soldering areas, it ensures solder is applied only where needed, minimizing the risk of short circuits and other defects.
  • Materials Used: Solder masks are typically made from epoxy-based resins or liquid photoimageable (LPI) materials. These materials withstand the high temperatures and harsh chemicals used in PCB manufacturing while providing strong adhesion. Green is the most common solder mask color, but blue, red, and black are also used for functional or aesthetic purposes.

How to Design & Manufacture Printed Circuit Boards

membrane switch customization

Now that we know the different components of a PCB, let’s discuss the design and manufacturing processes.

1. Creating the Schematic

The design process begins with creating a schematic—a blueprint that maps out all the electrical connections between components. Engineers use CAD tools to place symbols representing resistors, capacitors, ICs, and other essential parts, ensuring they are logically arranged for optimal function. These connections, known as “nets,” dictate how signals will flow through the board.

2. Simulating the Circuit

Before moving to physical design, engineers run simulations to test the circuit’s functionality. Using tools like SPICE, they analyze potential issues such as voltage fluctuations, signal interference, and component limitations. Identifying errors at this stage helps avoid costly revisions later in the process.

3. Setting Up the CAD Tools

Once the schematic is validated, designers configure the PCB layout software with design rules and constraints. These settings prevent overlapping connections, ensure correct trace spacing, and optimize component placement for performance and manufacturability.

4. PCB Fabrication Assembly

PCB fabrication is a multi-step process that transforms raw materials into functional printed circuit boards. Here are the key steps:

  1. Etching: The process removes unwanted copper from the PCB surface using a chemical etchant to create the desired circuit pattern. This is done with a photoresist mask that defines the areas to remain intact.
  2. Drilling: After etching, precision drills create holes for through-hole components and to form electrical connections. These holes are then plated with copper for continuity.
  3. Plating: Copper is applied to the surface of the PCB to enhance conductivity and prevent corrosion, using electroplating to coat vias, holes, and traces.

5. Applying the Solder Mask

After etching and plating the desired circuitry, manufacturers apply a solder mask to protect the copper traces and pads from oxidation, as well as prevent unintended electrical connections during soldering. The application of the solder mask usually involves a liquid coating, using processes like screen printing or curtain coating.

Once applied, manufacturers cure the mask with heat or ultraviolet (UV) light to harden the material and bond it securely to the PCB surface.

6. Silkscreen Printing the Circuit Board

Next, manufacturers apply silkscreen printing to add identifying marks, component designators, and other essential information to the PCB surface. This step uses special ink that resists the harsh chemicals and temperatures involved in the PCB manufacturing process.

Silkscreen printing not only provides valuable information for assembly and troubleshooting but also adds a professional finish to the PCB.

7. Component Placement

With the layout initialized, designers position component footprints on the PCB. Placement isn’t just about fitting parts—it must also consider factors like thermal management, noise reduction, and ease of assembly. Components generating excess heat are spaced appropriately, while high-speed signals are positioned to avoid interference.

  • Surface Mount Technology (SMT): A method of mounting electronic components directly onto a PCB’s surface, allowing for cost-effective, space-efficient, and highly automated assembly of complex circuits.
  • Through-Hole Technology: A PCB assembly technique where components are inserted through drilled holes and soldered, providing a stronger bond that withstands environmental stress and high temperatures.

A skilled manufacturer should be proficient in both techniques and help determine the best option for your project.

8. Routing the PCB

Routing involves drawing copper traces to connect components according to the schematic. These traces must maintain proper signal integrity, avoiding issues like cross-talk and electromagnetic interference. Modern CAD software offers automated routing features, but designers often refine them manually to ensure the best performance.

9. Optimizing Power and Ground Planes

To maintain signal stability, PCBs include dedicated power and ground planes. These layers distribute electrical currents efficiently, reducing noise and improving circuit reliability. Designers must ensure uninterrupted return paths to prevent voltage fluctuations that could disrupt operation.

10. Soldering

There are two types of soldering techniques

  • Wave Soldering: A traditional method where PCBs pass through a molten wave of solder, ideal for through-hole components and large surface-mount parts.
  • Selective Soldering: A modern technique using a controlled solder bubble to join components individually, offering precision for densely populated and smaller PCBs.

Both have their advantages and disadvantages, so talk with your manufacturer about which is right for your project.

Testing the PCB

testing printed circuit board

Finally, rigorous testing ensures the board functions correctly and reliably. This ensures that the PCB functions correctly and reliably before it is integrated into the final product. The testing process involves a series of comprehensive checks and evaluations to verify the integrity of the PCB’s design and functionality.

1. Design Verification

Before a PCB is physically manufactured, design verification ensures that it meets all required specifications. Using simulation tools, engineers can model how the PCB will behave under various conditions, testing aspects such as power distribution, signal integrity, and thermal performance.

This step helps identify potential design flaws before fabrication, reducing the risk of expensive rework.

2. In-Circuit Testing (ICT)

In-circuit testing is a fundamental process that checks the electrical integrity of the PCB. Using a specialized test fixture with probes, ICT identifies open circuits, short circuits, incorrect component values, and soldering defects.

This method allows manufacturers to catch errors early, ensuring that all connections are properly formed before the board moves to the next stage.

3. Automated Optical Inspection (AOI)

Automated Optical Inspection (AOI) uses high-resolution cameras and advanced imaging technology to scan the PCB for physical defects. This includes issues such as misaligned or missing components, soldering inconsistencies, and board contamination.

AOI is especially useful for identifying errors in high-density PCBs where manual inspection would be time-consuming and less accurate.

4. Functional Testing

Functional testing evaluates the PCB’s performance under actual working conditions. This test simulates the electrical load and functionality of the board, verifying that it operates as intended.

Engineers check for signal integrity, power fluctuations, and processing errors, ensuring that the board is ready for integration into the final product.

5. Environmental Testing

To ensure the PCB can withstand varied operating environments, manufacturers subject the boards to extreme conditions such as:

  • Temperature Testing: PCBs are exposed to both high and low temperatures to check for thermal expansion and contraction effects.
  • Humidity Testing: These tests evaluate the PCB’s resistance to corrosion and degradation in high-moisture environments.
  • Vibration and Shock Testing: Simulating mechanical stress ensures the PCB can endure physical shocks and vibrations, crucial for automotive and aerospace applications.

6. Compliance Testing

Regulatory compliance is essential for PCBs used in medical, automotive, aerospace, and consumer electronics. Compliance testing ensures that the board meets safety, electromagnetic compatibility (EMC), and industry regulations such as:

  • IPC Standards (Association Connecting Electronics Industries) for PCB manufacturing quality.
  • RoHS (Restriction of Hazardous Substances Directive) for lead-free and environmentally friendly production.
  • UL Certification for fire safety and durability requirements.

Overall, the PCB manufacturing process is a complex yet highly precise operation that requires careful attention to detail at every step. By following established procedures and utilizing advanced manufacturing techniques, PCB manufacturers can produce high-quality printed circuit boards that meet the demanding requirements of modern electronic devices.

Create A Custom Printed Circuit Board With Hallmark Nameplate

A trusted manufacturer is crucial for designing, assembling, and producing high-quality circuit boards. A skilled circuit designer can craft a printed circuit board tailored to your specific needs. Additionally, rigorous testing procedures guarantee that every aspect of the PCB functions as intended, minimizing the risk of failures in the future.

At Hallmark Nameplate, we understand the critical role that PCBs play in your products. That’s why we are committed to providing the highest quality PCB assembly services. With our expertise and dedication to excellence, we strive to empower businesses with the tools they need to succeed in today’s competitive market.

Contact us today or request a FREE quote to see how we can create the exact circuit board to fit your needs!