60-years-of-experience

60+ Years of Experience

satisfaction-guarantee

Satisfaction Guarantee

short-lead-times

Short Lead Times

QR Code Prints: How Your Businesses Can Implement Them To Stay Ahead in 2022

Want to step up your business? Are you looking for creative ways to enhance your customer service and marketing?

Let’s talk QR codes.

QR codes are a great way to enhance parts of your business and are both easy and cost-effective to implement.

In 2020, when Covid-19 cases skyrocketed and everyone started social distancing, QR codes became increasingly popular.

But as we go back to our pre-pandemic lifestyles, we can continue to use QR codes in innovative ways.

In this article, we will discuss:

  • What are QR codes?
  • How do QR codes work?
  • 6 creative ways you can use QR codes in your business.
  • Key considerations when designing QR code prints.
  • Where to get the best QR code prints.

Let’s dive in!

What Are QR Codes?

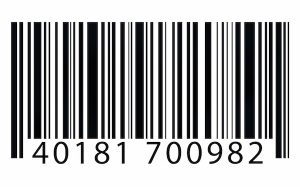
We’ve all seen Universal Product Code (UPC) barcodes on retail products we’ve bought. They are scanned at checkout and keep track of the product’s price.

In 1994, Quick Response (QR) codes were introduced and created a whole new, more interactive, way to use codes.

QR codes hold way more information than traditional barcodes and can be scanned with a smartphone by anyone.

If you want to learn more about barcodes, you can read our other article How to Print Barcodes 101.

How Do QR Codes Work?

QR codes are made up of black and white machine-readable squares inside a square grid. It is then processed by software to extract the data on them.

qr code print

There are two types of QR codes: static and dynamic.

  • Static QR code – code with fixed content.
  • Dynamic QR code – allows you to change its information as needed because it is outside the code.

If you have a typo in your static QR code, you’d have to start from scratch. With a dynamic QR code, however, you can make edits to your content.

6 Creative Ways You Can Use QR Code Prints

So, how can you use QR codes in your business? They can be beneficial for your sales, marketing, customer service, feedback, and more.

Here are a few ideas to help you get started on your QR code print.

1. Link to Landing Page or Website

Looking to bring more traffic to your website or landing page? A QR code is a unique and creative way to direct customers, or potential customers, to your content.

This is great for high-traffic areas to capture people’s attention. Additionally, it is a lot easier than inputting a URL, which most people can’t do on the go.

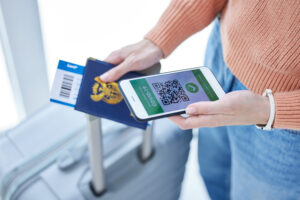
2. Improve Customer Experience

If you have gone out to eat in the past two years, you have probably seen QR code menus. They are a great way to reduce paper waste and improve the customer experience.

qr code print menu

But you can use a QR code for more than just a restaurant menu!

If you have a long list of services you provide, you can have QR codes placed in your building for customers to view while waiting.

On the other hand, if you have a retail store, you can have QR codes on tags for customers to add to their online cart if they aren’t ready to buy or you don’t have their size in stock.

3. Create Business Cards

Ever struggle to fit everything important on a business card? Want to make your business card stand out?

You can make business cards with a QR code that directs the user to a resume, portfolio, or website. This way, you can fit everything you need and more!

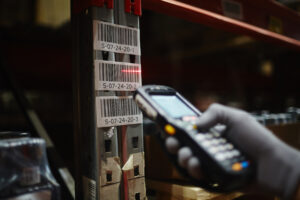
4. Manage Your Supply Chain

Do you ever worry about counterfeit goods? QR codes can help you to authenticate and track products throughout your supply chain.

qr code print for supply chain management

You can put it on your inventory to better monitor, track, and manage all of your moving parts. This can even include returns from customers!
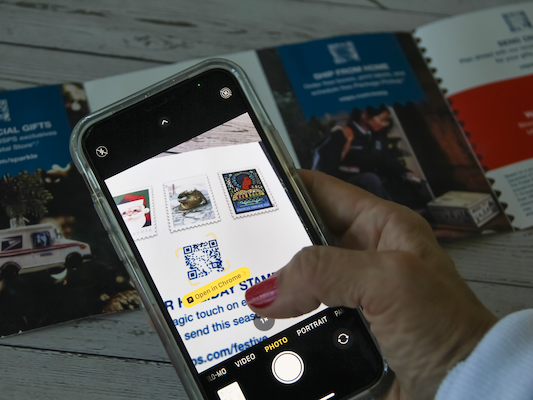
5. Enhance Products

Do you get frustrated calls from customers who lost their instructions or can’t read the small text? You can use QR codes to add instructions to your products.

All your customers would have to do is scan the product, and they can get pages and pages of instructions. Plus, they can zoom in if needed!

Another way you can use QR codes to enhance your product is by using them to make re-fills easier. Whether it is for prescriptions or shampoo, you can add a QR code to the bottle that your customer can scan when they are about to run low and reorder.

6. Encourage Feedback

Most consumers don’t give feedback because it is inconvenient. So, any step you can take to make it easier, the more likely they may be to leave a review.

qr code print
SOURCE

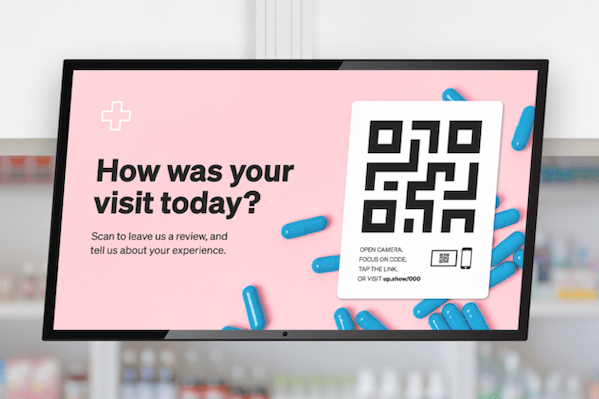
You can set your QR code to take them to a place to leave a Google review, access your social media platforms, or even submit a survey.

Key Considerations When Designing QR Codes

Once you’ve decided what type of QR code you want to create, it’s time to get designing. There are some do’s and don’ts when creating a QR code print, so we’re here to walk you through the basics.

Avoid Too Many Codes At Once

If you have too many QR codes next to each other, or if you have QR codes next to barcodes, it can make it difficult to scan the correct code. So, if you need to have several codes on your asset, make sure they are far apart from each other.

Pro tip: You can link multiple URLs in a single QR code. For example, to take them to the different devices’ app stores.

Pick the Perfect Size

There is no point in going through the process of creating a QR code print if it will be too small to notice. You also need it to be big enough to be scanned by an app.

But, you also do not want to sacrifice the design of your asset with a QR code that is too large. Consider where the QR code will be located and how close the user will be.

Create A Clear Design

While it is fun to get creative with your design, you still want it to be recognizable as a QR code. Some apps cannot pick up on complex designs, so keeping them simple and clear is crucial.

qr code print

Additionally, you want to make sure it is clear to the user that it is a QR code that they can scan. If they can’t recognize that it is a code, they won’t be scanning it, and all your work will go to waste.

Use High-Quality Images

If you are going to blow up the QR code for a large print, you want to make sure the image of the QR code is high-quality. That way, you do not have to worry about pixelated and blurry QR codes.

Vector files like EPS and SVG are perfect for larger prints. Ask your manufacturer to do a prototype so you can be sure everything looks okay.

Select the Right Material

When picking out the right material to put your QR code print on, there are a few things you need to consider.

qr code print

You will want to think about which material can handle the environment the QR code will be in. Some people like their QR codes on plastic labels that can stick places, while others try glass or aluminum.

Double-Check Everything

Worried you made the wrong step and chose the wrong size or image? That’s why you should always test!

Before ordering a large quantity of QR code prints, get a prototype to test to make sure the code is scannable and that your link works.

Get High-Quality QR Code Prints From Hallmark Nameplate

Ready to get creative? Our designers can help bring your idea to life. We will walk you through every step along the way to help you create the best print for your application.

We have a wide array of high-quality, durable materials to make sure your QR code stays scannable.

At Hallmark Nameplate we strive to always exceed our customers’ expectations! Contact Hallmark Nameplate today to create your custom QR code print.

UI Design Principles for Membrane Switches and Overlays

Creating the perfect device or piece of equipment can be tricky. Every aspect needs to be designed with the end user in mind.

But how can you know exactly what your user needs to be efficient? With lots of testing and designing and a few basic UI design principles in mind.

In this article, we will discuss:

  • What is UI design?
  • What is a user interface?
  • Why is UI design important for your membrane switch and devices?
  • UI design principles
  • Elements to consider when designing switches

Let’s dive in!

What is UI Design?

UI stands for the user interface. UI design is also known as user interface engineering.

This means the design is focused on the user’s experience and their interaction with your device.

Your main goal is not to create just a visually appealing device but design one that is simple and easy to use. A good UI design uses UI design principles to guide every element when creating components.

What Is a User Interface?

The user interface is what connects humans and machines. It can make a huge impact on the way someone interacts with your device.

ui design principles

A user interface has the basic common elements.

Input Controls:

  • Buttons
  • Checkboxes
  • Dropdown Lists
  • Data Fields
  • Text Fields
  • Toggles

Navigational Components:

  • Slider
  • Tags
  • Icons
  • Search Field
  • Breadcrumb
  • Pagination

Informational Components:

  • Progress Bar
  • Notifications
  • Message Boxes
  • Tooltips

Containers:

  • Accordion

When choosing which components and controls to use, you will want to consider UI design principles.

Why Is UI Design Important for Your Membrane Switch and Devices?

Graphic overlays are printed interfaces that can help users effectively interact with your device when designed properly and with UI design principles in mind.

When creating membrane switches or graphic overlays, you need to consider UI design to ensure the safety and efficiency of the user.

ui design principles for graphic overlay

If you are creating devices for demanding applications, such as those for the medical industry, someone’s life can rest in the hands of the user of your device. When it comes down to it, the medical professional does not care if the device is sleek looking- they want something functional.

UI Design Principles

When designing your graphic overlay and membrane switch, here are a few design principles to consider.

Focus On What Delivers Value

Function over form. Let us say that again in case a designer didn’t hear us. Form always comes after function!

While you want your equipment to be aesthetic if someone can’t use it adequately then it’s not beneficial. Every element should have a purpose and make a positive impact on the user’s experience.

The designer needs to be a problem solver and create solutions for the user.

Before adding an element to your design, ask yourself, “Why are you adding this?” if the answer is, “Because it looks good,” then you are focusing on the wrong thing.

Frustration-Free

Your goal is to reduce friction for the user. Remove any unnecessary steps to get their desired result.

You want to make their job easier and help them reach their goals. Some ways you can do this is by simplifying navigation and removing the number of clicks it takes to get to their intended destination.

Pro tip: Watch how people interact with your prototype to see what changes need to be made to make things easier.

Keep It Simple

Your interface shouldn’t feel like work. Keep the interface simple and do not use elements that are unnecessary.

You also want to keep all messaging simple with clear language.

If things are too complicated, the user can get confused and not know how to interact with your device. They should be able to easily tell what each button does and feel confident in their ability to use it.

When people can’t understand your device, they won’t want to use it.

Consistency Is Key

The first way to stay consistent is by using common elements in your user interface so that the user can easily identify elements. When they are able to recognize familiar elements, it can make them feel more comfortable.

You also want to remain consistent in your use of language, design, and layout throughout all of your devices. This way, the user of your equipment or devices can easily transfer their knowledge.

Use Font Size, Colors, and Textures Deliberately

Your use of colors and font size can impact how the user views your interface. With just a simple change, you can bring attention to an important element.

The typography or colors you choose can create clarity and a hierarchy.

For example, big red text can warn the user of danger. You can also make a button of importance a dome with tactile feedback so it can be easily located.

Speaking of tactile feedback, this brings us to our next section: elements to consider when designing your custom membrane switch.

Elements To Consider When Designing Switches

When designing your interface, there are a few elements that are important to consider. The better you understand the benefits of these elements, the easier it will be to craft the perfect device.

Tactile or Non-Tactile

A tactile switch provides the user feedback when pressed. This is a great way to help the user feel confident they pressed a button.

This is important for devices that may need to be used when the user can’t look. For example, when creating switches for an airplane cockpit, you would want to incorporate tactile switches.

LED Backlighting

If your device will be in a dark location, you want to add LED backlighting to your membrane switch. This can help make it easier to find when visibility might be an issue.

ui design principles, membrane switch backlighting

An LED light when unnecessary can be wasteful, using more energy than needed and possibly taking up space.

Materials

Choosing the right material for your design is all about considering its purpose. Two common graphic overlay materials are polycarbonate and polyester.

But if you are going to be putting your graphic overlay on a device that will be in extreme conditions, you may want a metal substrate like Metalphoto.

Design Your User Interface With Hallmark Nameplate

At Hallmark Nameplate, we understand the importance of incorporating UI design into your devices. When we assist you in manufacturing your membrane switch or graphic overlay, our experienced designers will work with you to craft a simple and functional interface.

We will ensure that not only does it meet all certifications, but it is designed to make the user’s experience stress-free. Additionally, we always use durable materials to ensure your devices last.

Request a quote today and create equipment and devices that people want to use.


How Do Barcodes Work? Everything You Should Know

If you are like most savvy business people, you are continually on the lookout for new and better technologies to make your operation more efficient and profitable. Among these technologies are barcodes, which can be a great business resource. But, how do barcodes actually work?

In order to maximize the benefits of barcodes, it is important that you understand the proper ways to implement them in your enterprise. So if you’re wondering how barcodes work, then this article will serve as an introduction to creating and printing barcodes. Let’s dive in!

What Are Barcodes?

Barcodes translate the complex features of a product into a simple language that machines can understand. Essentially, these linear or two-dimensional patterns of parallel lines and spaces encode crucial information about an item, such as its identification number, price, or other distinguishing features.

Serving as digital fingerprints, barcodes streamline the checkout process, manage inventory effortlessly, and provide a universal system for tracking goods across the supply chain. From the beep at the checkout counter to the seamless logistics in warehouses, barcodes quietly facilitate the smooth flow of products in our bustling world of retail and beyond.

There are many different types of barcodes and each has a unique purpose for the industry in which it is used. However, every barcode falls under one of two categories: 1D (linear) barcodes and 2D (matrix) barcodes.

1D (Linear) Barcodes

1D barcode scan

1D barcodes, also known as linear barcodes, are the traditional black-and-white striped patterns found on product labels and packaging. Utilizing a series of parallel lines and spaces of varying widths, they encode alphanumeric information in a linear format.

Widely used for inventory and retail purposes, 1D barcodes streamline transactions, enhance accuracy in product identification, and serve as an efficient tool for tracking items from manufacturing to point of sale.

Types of 1D Barcodes:

  • UPC code – retail
  • EAN code – retail
  • Code 39 – automotive & defense
  • Code 128 – supply chain
  • ITF – packaging
  • Code 93 – retail, manufacturing, & logistics
  • Codabar – logistics, healthcare, & education
  • GS1 DataBar – retail & healthcare
  • MSI Plessey – retail

2D (Matrix) Barcodes

2D barcode

2D barcodes, distinguished by their square or rectangular matrix of black squares arranged on a white background, represent a technological leap beyond their 1D counterparts. Capable of storing significantly more data, including text, numbers, and even small images, 2D barcodes are versatile and space-efficient.

Frequently seen in applications like mobile payments, boarding passes, and product packaging, they offer enhanced functionality and enable quick access to detailed information.

Their ability to hold diverse data makes 2D barcodes invaluable for applications ranging from logistics and healthcare to marketing, providing a compact and powerful means of information storage and retrieval.

Types of 2D Barcodes:

  • QR Code – retail, entertainment, & advertising
  • Data Matrix Code – electronics, retail, & government
  • PDF417 – logistics & government
  • Aztec – transportation

How Do Barcodes Work?

When scanned, a barcode reader emits light onto the code, and the contrasting patterns reflect the light back to a photosensitive element in the scanner. The scanner then translates the reflected light into an electrical signal, essentially reading the pattern of bars and spaces. This signal is then decoded into the alphanumeric information embedded in the barcode, whether it be a product code, identification number, or other relevant data.

The beauty of how barcodes work lies in their universality; their standardized format allows them to be read by various scanners, seamlessly integrating them into a vast array of industries for purposes ranging from inventory management to expediting the checkout process at your local store.

Before you can create the graphic part of your barcodes, you must first understand the codes behind them, or literally the coding behind the codes. Also called SKUs, product codes, or item numbers, these are what your final barcodes will stand for. They could also be thought of as the naming convention behind your barcodes. This is the information that barcodes can help you to keep track of.

Creating Your Barcode

barcodes

Now that you know how barcodes work, let’s discuss how to create the actual barcode. Creating barcodes is a strategic process that goes beyond the visual appeal of those black-and-white patterns. It involves choosing the right barcode type that aligns with your needs, deciding on the essential information to encode, and formulating a clear and intuitive formula for your organization.

Whether generating a single barcode or mass-producing, precision is crucial—individual barcode generators work for smaller needs, while seasoned professionals ensure error-free production for larger volumes. The key lies not just in the graphic design but in crafting a barcode that becomes the invisible thread tying your products, inventory, and business efficiency together seamlessly.

Here are 5 key steps to building the perfect barcodes for your specific applications.

1. Choose the Suitable Type of Barcode

First, what kind of barcode do you want on your product? There are different types of barcodes, each able to accept different types of characters. these different types of barcodes can alter or validate your naming convention. You should decide what kind of barcode is best suited to your use.

2. Decide What Information to Include

Next, you should determine what information is most important to tell your products apart. This might include such factors as the shape, size, color, material, type/category/department, warranty, vendor/manufacturer, quantity, etc. It is important to remember at this point that there is very little that can’t be coded in a barcode, but you must make sure that the information that you want to include is what will best identify the product.

It is also important that you consider the future of your product line at this point. Don’t settle on a barcode that you will quickly outgrow. For example, if you decide that you have a given number of colors of your product, your barcode will quickly become obsolete when you expand to include more colors.

3. Create a Formula

Now, create a formula that is easy to understand by anyone in your organization. It should follow a standard format, such as size, shape, and color. this way it is easy to read the meaning of the code and tell your products apart. Further, to keep the same format, you will be allowing your offerings to grow without interfering with the convention.

It is important to remember to use letters and numbers that are easy to read and are not easy to misread. Consider the use of capital Is and L, for example. When they are used close together, they can be easily confused. Another example is the use of Zs and 7s. Also, it is helpful to abbreviate whenever possible.

Regardless of the convention that you use, make sure you keep a record of it so you won’t forget it.

4. Generate Your Barcode

It is now time to generate your actual barcode. That is easily done in one of two ways, whether by using an individual barcode generator or with a mass barcode generator. If you only want to generate one barcode, an individual barcode generator can be found in many places on the internet.

If, on the other hand, you want to mass-produce barcodes, it is usually easier to use a commercial company that has experience in these types of print jobs. This experience will minimize the chances that you will create errors that will confuse the entire effort.

5. Other Considerations – Logistics

Once you have your barcode graphic, there are several steps involved in the next operation. First, depending on the size of your operation and the extent of your product line. It is at this stage that you should decide whether printing the barcode on your packaging or on your individual products would be most appropriate for your use. 

You may also want to consider whether to use screen printing or digital printing to create your barcodes.

It is important to remember that your barcodes will be read by both people and scanners. This can be confusing when barcodes were designed for use by machines, but cannot be read by humans. Now it is time for you to approach your printer about finishing the job.

Contact a Professional Printer for Your Barcode Needs

warehouse barcode printing

Congratulations! You have mastered how barcodes work, now you can apply what you know to your own business.

If you need barcode printing done right, you can contact our certified printing experts at Hallmark Nameplate. We have been printing barcodes, graphic overlays, and more for 35+ years for a variety of industries.

Visit our website today and request a FREE quote to take your business to new heights.