60-years-of-experience

60+ Years of Experience

satisfaction-guarantee

Satisfaction Guarantee

short-lead-times

Short Lead Times

What Are Membrane Switches? Tactile and Non-Tactile

When you work with a corporate manufacturing facility that mass produces, they often throw a lot of big words around without explaining anything.

That can make the design and selection process very overwhelming and confusing.

So, we wanted to take the time and walk you through the basics of a membrane switch so you understand what you are spending money on creating.

In this article, we will discuss:

  • What are membrane switches?
  • The anatomy of a membrane switch
  • Applications of membrane switches
  • Benefits of membrane switches
  • The differences between tactile and non-tactile switches
  • Types of tactile switches

Let’s dive in!

What Are Membrane Switches?

Membrane switches are electrical switches for turning a circuit on and off. It differs from mechanical switches made of copper and plastic parts.

A membrane switch is a circuit printed on PET or ITO. The ink used for screen printing is usually copper, silver, and/or graphite filled, and is therefore conductive.

Membrane switches are user equipment interface utilities that allow for the communication of commands from users to electronic devices. Membrane switches are one category of interface utilities alongside touch screens, plastic keyboards, toggle switches, and many other kinds of control systems.

Interface utilities can be as simple as tactile switches for controlling lighting, and they can be as complicated as membrane keyboards and switch panels for use with computers.

Anatomy of Membrane Switch

A membrane switch typically has four or more layers. The top layer of a membrane switch is the graphic interface between the user and the machine.

The other critical layer is a printed circuit or a flex circuit made of copper and polyimide material. There is the top circuit layer and a lower circuit later with a circuit spacer in between. 

The layers are assembled using pressure-sensitive adhesives. A printed shorting pad or metal dome that stands on legs can create contact between the two traces.

Applications of Membrane Switches

There are so many ways membrane switches can be used in our day-to-day lives. 

what are membrane switches


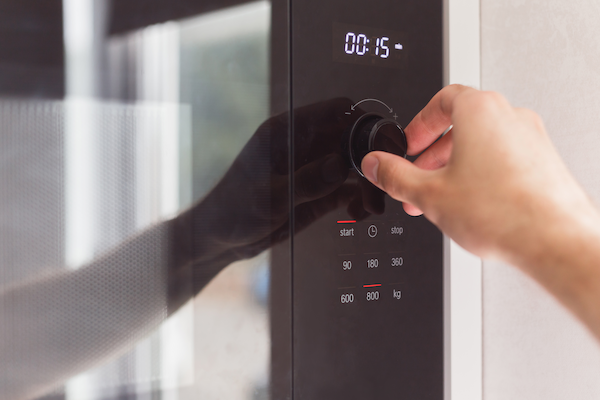
Some examples of where you can find membrane switches are:

  • Microwave oven panels
  • Air conditioner control panels
  • TV remote controls
  • Medical equipment
  • Gym machine controls

The tactile feedback of keys can be provided by embossing the top PET layer or embedding metal snap domes, polyester domes, or forming the graphic layer.

Benefits of Membrane Switches

The benefits of membrane switches include:

  • Ease of cleaning
  • Sealing ability
  • Low profile
  • Reliability
  • Durable
  • Improves safety

Membrane switches are used with other control systems, such as touch screens, keyboards, and lighting.

Sometimes they are complicated like the membrane keyboards and switch panels in mobile phones and computers.

Membrane Switch Designs

Design membrane switches to meet your environmental considerations. Additionally, internally vent and seal switches to protect your equipment from contaminants.

Membrane switches can also be provided with or without terminating connectors as well as:

  • LED Indicator Lights
  • Backlight (LED, fiber optic, EL)
  • Chemical and Weather Resistant
  • ESD/EMI/RFI Shielding
  • Domes
  • Embossing
  • Various connector configurationswhat are membrane switches

When you create your membrane switch you get to customize every aspect to your applications’ needs.

Embossing Options

There are two main embossing options to choose from.

The standard pad is when the full key is raised. You can choose a round or rectangular shape to match the underlying key.

The rim option is when only the perimeter is raised. The recommended size is a rim width of at least .05″ and a height of no more than 1.5-2 times the overlay material’s thickness. A corner radius of at least 0.031″ is also recommended with spacing between the emboss features of at least .125″.

Another option is dome emboss which offers feedback even for a non-tactile switch. Speaking of dome…

Dome Types

When choosing a dome, there is a  wide ray of materials and sizes to choose from. We recommend using metal for its durability.

The sizing options include:

  • 6MM
  • 8MM
  • 10MM
  • 12MM
  • 16MM
  • 20MM

You can also create a dome that is oblong, a thin oval shape.

Circuit Materials

There are three options when choosing circuit materials.

Silver is the most common choice due to its simplicity and cost-effectiveness. Silver conductive ink is printed onto the polyester circuit material.

The copper flex circuit is popular for complex circuitry. You can solder several components to the circuit and can accommodate any of your applications’ needs.

A popular option for complex designs is a rigid printed Circuit board (PCB). Conductive silver ink is printed right onto a polyester layer, then a contact surface of etched plated copper is enclosed in a PCB inside an epoxy for insulation. A dielectric layer is added for further protection.

Connector Options

The connector is responsible for attaching the switches’ sensors to the circuit board. There are five connector options:

  • Bare Tail – These interface to .100″ center zero insertion force (ZIF) or low insertion force (LIF) style connectors
  • Latching Female Connector – These interface to .100″ center latching headers
  • Latching Male Connector – These interface to .100″ center latching headers
  • Plain Male Connector – These interface to .100″ center female headers
  • Plain Female Connector – These interface to .100″ center and .025″ square-posted headers

Choose wisely, because a subpar connector will lead to unreliable switches.

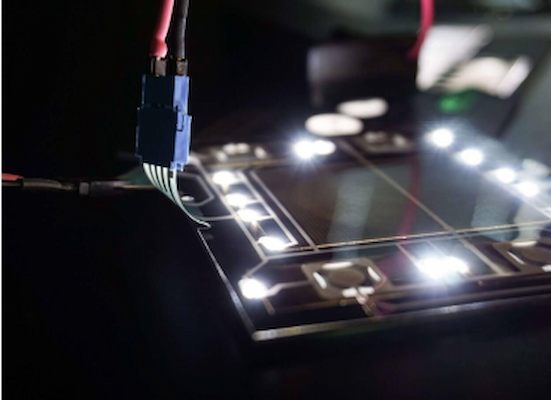
Backlighting Options

Backlighting is another way to make it easier for the user to find important buttons. there are three main backlighting options to choose from:

  • Fiber Optic – This cost-effective option is two layers of woven fiber-optic cloth that emits light.
  • Light Emitting Diodes (LED) – Another affordable option but is not an effective indicator light. You can choose between blue, green, red, white, and yellow and select an intensity level.
  • Electroluminescent (EL) Lamps – It relies on phosphors that convert electrical energy into light. It is highly efficient and minimizes energy waste. This is the perfect option for buttons that aren’t left on for long, because they do decay.

Your manufacturing facility partner can help you determine which option is best for your application.

Shielding Types

This protects the switch from damage from electromagnetic interference (EMI) and electrostatic discharge (ESD).

There are three different ways shields can be terminated:

  • Connector – The on switch tail can also terminate the shield.
  • Conductive adhesive – Electrically conductive adhesive can be used to connect.
  • Tab – The switch’s tab can be connected with a stud of standoff located on the metal enclosure or backer.

There are also three types of shielding:

  • ITO clear conductive shield – This type can be terminated with conductive adhesive
  • Foil shield – Can be terminated to a tab
  • Connector – The pin on the switch can also terminate the shield

Additionally, when creating a membrane switch you can select if you want to create a tactile or non-tactile switch.

The Difference Between Tactile and Non-Tactile Switches

The differences between tactile and non-tactile switches are crucial to know but simple to understand. As the name probably suggests, tactile switches provide tactile feedback. Let’s dive into what this really means.

Tactile Switches

A tactile switch is an on/off electronic switch that is only on when the button is pressed, or if there is a definitive change in pressure. Another way to consider it is as a momentary make-or-break switch. As soon as a tactile switch button is released, the circuit is broken.

The main area of tactile switches is tact switches. Tact switches are tactile electromechanical switches for keyboards, keypads, instruments, or interface control-panel applications.

Tact switches react to user interaction with the button or switch when it makes contact with the control panel beneath. In most cases, this is usually a printed circuit board (PCB).

Types of Tactile Switches

There are many different kinds of electronic Tactile Switches; there is a variety to select from. Some types that are available include:

  • Standard
  • Illuminated
  • Sealed
  • Key Tops
  • Surface Mount
  • Hinged

At Hallmark Nameplate, we are here to assess your needs and create the best, most functional membrane switches to suit your needs, with your budget in mind. Our offerings include a range of sizes and styles.

Applications of Tactile Switches

Typical tactile switch applications include low power, miniature devices, digital switching, and if operator feedback is required (with a switch confirmation coming from the switch being depressed).

Tactile switches are internally vented. As a result, you can expect a complete seal on your membrane switch.

Additionally, our tactile switches are capable of more than one million actuations, making your options and functionality virtually seamless.

Non-Tactile Switches

The most reliable and economical membrane switch is the non-tactile type. However, they do not give the user direct feedback from the switch.

Using an LED indicator or display change can sometimes overcome this drawback. Non-tactile switches also have the advantage of easily creating custom shapes and sizes of the active keypad areas.

Non-tactile switch types feature a robust construction. They’re completely sealed from the external environment. They are also more versatile than tactile switch types, with more than five million actuations.

Create Custom Membrane Switches With Hallmark Nameplate

If you want to create high-quality custom membrane switches, then you have come to the right place. We strive to always exceed our customers’ expectations by walking you through the entire process to make sure everything is perfect.

At Hallmark Nameplate, you can rest easy knowing that your product will be developed by our in-house design and engineering staff from concept to completion. Request a quote today!

What is Electrostatic Discharge? Your Complete Guide to ESD Safety

Do you ever sit down on a metal chair and feel a shock run through you? It’s not a pleasant feeling.

Now imagine that shock going to your electronics. You can probably imagine how that can be bad.

This is called electrostatic discharge.

Now you may be wondering, what is electrostatic discharge? Keep reading to find out what it is, the damage it causes, and how you can prevent it.

Let’s dive in!

What is Electrostatic Discharge?

Electrostatic discharge is what happens when the flow of electricity between two objects that are electrically charged is suddenly shorted by contact between those two objects. This happens because there has been a buildup of static electricity between the two objects.

Static electricity can build up between objects due to tribocharging or by electrostatic induction. Usually, when electrostatic discharge occurs, there is a visible spark of electricity between the two electrically charged objects that were brought together.

what is electrostatic discharge

In fact, electrostatic discharge can produce amazing electrical spark shows. In the natural world, lighting that is accompanied by the sound of thunder is a large electrostatic discharge event. Other times, electrostatic discharge may produce no sparks or noise at all.

However, even when it is unnoticed, electrostatic discharge can still cause damage to electronic devices.

Dangers of Electrostatic Discharge

Industries that use electrical devices have to constantly be on guard against electrostatic discharge. It can have harmful effects on a variety of industries.

The electrostatic discharge causes explosions in natural gas, vapors of auto fuel, and coal dust. Additionally, it can also destroy integrated circuits. Because of the dangers to products and instruments from electrostatic discharge, the manufacturers of electronics have established areas in dangerous environments that are static-free. These are electrostatic-safe areas.

Create these areas by taking measures to prevent charging and to remove static, such as:

  • Using grounding of human workers
  • Supplying antistatic devices
  • Avoiding highly charged materials
  • Controlling the humidity in an environment

Following these steps will help decrease the chances of electrical discharge.

What is Tribocharging?

Tribocharging, which is a common cause of static electricity, can be accomplished through a variety of means. Walking on a rug is an example of tribocharging, as it brings two electrically charged materials (the human and the rug) together, then quickly separates them.

Rubbing a plastic comb on dry hair is another example of tribocharging that produces static electricity. Rubbing a balloon against a piece of wool, getting up from an upholstered car seat, and taking certain types of plastic packaging off of a product all tribocharge and produce static electricity. When one of the tribocharged items touches another charged item, a spark may be seen or felt, and electrostatic discharge occurs.

How Does Electrostatic Discharge Occur?

Electrostatic discharge can also occur via electrostatic induction. This happens when an electrically charged object is near an object with conductive properties not touching the ground.

The charged object creates a field of electrostatic energy that redistributes the electrical charges on the surface of the non-grounded object. When this happens, the un-grounded object now has areas where there is an excess of positive and negative charges on it.

Electrostatic discharge may occur when the un-grounded object touches something with conductivity. An example of this is the surface of styrofoam cups. They cause electrostatic induction on nearby sensitive objects. Electrostatic discharge may occur if they are touched with anything made of metal.

Most spacecraft are prone to electrostatic discharge because of charged particles pinging against them. This causes increased charging on the surface, making them prone to electrostatic discharge.

Damage to Electronic Equipment

what is electrostatic discharge

The most dangerous part of electrostatic discharge is the spark. It can cause minor pain to people, and severe damage to electronic equipment. Fires and explosions may occur in areas with charged air and combustible gases and/or particles.

However, even without a spark, damage from electrostatic discharge can occur. Even tiny amounts of discharge can damage electronics. Either by breaking them completely or by making them more prone to degradation over time. This affects their long-term reliability and performance.

Types of ESD Events that Cause Electronics to Fail

Discharge to Electronic

This typically occurs when an electrostatic charge comes from a person to the device. For example, if they walked across the room and accumulated electrostatic charge and then began working on the device. Similarly, damage can occur if you use a charged conductive tool to work on an electronic during assembly.

Discharge from Electronic

Your electronic device can accumulate a static charge during manufacturing when rubbed against a surface or shipping in its packaging material. When things are mass-produced with automated assembly it can lead to a higher chance of component failure.

Field-Induced Discharge

When an object becomes electrostatically charged it creates an electrostatic field. Then when an electronic device is in that field and grounded, a charge transfers from the device. Then, if removed from the field and grounded again, a charge occurs from the device.

Protecting Against Damage

Because electronic discharge damages so many electronic components, it is necessary to protect against it. Protect sensitive materials during every process including:

  • Manufacturing
  • Storage
  • Shipping
  • Assembly
  • Consumption

An effective and important method of preventing electrostatic discharge is grounding. Perform grounding regularly and routinely check everything is in the proper position to be effective.

While electrostatic discharge is a natural phenomenon, it can damage electronic equipment, hurt humans, and even damage workplaces and cities. Minimized or prevent possible damage with the proper safety precautions in place. This is good for the safety of all.

Keep Your Devices Safe From Electrostatic Discharge with Hallmark Nameplate

If you have any questions about electrostatic discharge and how Hallmark Nameplate maintains an ESD-Safe environment give us a call or visit our website. We have seasoned personnel who can answer any questions you may have about our electronic assembly services.

What it Means to Have an ESD-Safe Production Environment

There is nothing worse than spending money on manufacturing an electronic device only to learn that one of the parts is damaged.

The production of printed control boards (PCB) requires that the surrounding environment is safe from electrostatic discharges (ESD) as much as possible.

When you begin working with a new manufacturing company you need to ensure that they are creating your PCBs in an ESD-safe production environment. In order to do that you first need to know what ESD is.

Let’s start with the basics.

What is ESD?

An electric current discharged between objects with varying charges, creating an electromagnetic buildup. Static electricity and electrostatic induction are the main causes of ESD.

When one material rubs against another and then separates it releases an electrical discharge such as a spark. You have probably experienced this when you slide your feet on carpet or when you rub a balloon on your hair.

what is esd

This electrical spark can cause damage to sensitive electrical components like a PCB.

Why

4 Steps to Accomplish an ESD-Safe Production Environment

An ESD of as little as 30 volts can cause damage to electronic components in a PCB during its production, storage, and/or shipping stages. When you consider that the average ESD you feel when walking across a carpet contains about 3000 volts, it doesn’t take much to hurt a circuit board.

This is why it’s imperative to take the following steps to ensure that the cleanroom where the PCBs are made is an ESD-safe working environment.

1. Put Down ESD-Resistant Flooring

The working space needs to be free of things that can cause ESD releases to occur. This means the flooring has to be ESD-safe. Remove carpeting and replace it with anti-static materials like static dissipative tiles (SDT) for the floor.

The tiles typically have a 4-layered structure:

what is esd
SOURCE

The base layer is made with a static dissipative adhesive to affix the tile to the sub-flooring.

On top of the base layer, is another one made of conductive metals like copper strips.

The third layer of the SDT is typically made out of plastic because of its conductive ability. Some tiles have added bits of carbon graphite, aluminum flakes, carbon fiber, and other conductive materials to increase the conductivity of the tiles.

The fourth layer is often an anti-static acrylic floor polish to cover the tiles. This flooring system takes an electrical charge that gets created by something or someone moving over the floor. Since an electrical charge will follow the path of least resistance, it will flow from the top of the floor down through the adhesive. There it gets grounded and dissipates.

When using flooring mats at workstations ensure matting has a material like conductive carbon fibers. This will disperse the electrical charge from the mat to the SDT tiles under it.

2. Provide Protective Clothing

To keep the room ESD safe when making printed circuit boards, regulate the clothing people wear in the clean room. Workers should be wearing shoes with static dissipating soles that meet the ESD-compliance guidelines. On the side of the shoes, the letters “SD” identify compliancy.

Regular clothing often builds up electricity that can lead to an ESD. When entering a cleanroom dress in clothing made with electrically conductive textiles. The clothing incorporates metal strands mixed with other materials like cotton to make cloth for the clothing. Protecting hands with ESD-safe gloves is also important to minimize the risk of discharge.

A worker should also be “grounded” when working in a cleanroom. This is achieved by having the workers wear grounding wristbands. The wristband moves an electrical charge from the person to the ground where it dissipates.

3. Use ESD-Safe Tools

Tools used in the cleanroom should have a double-layered grip made out of a material like polyethylene. This minimizes the movement of an electrical charge from a worker to the electronic device she is working on. Plug your electronics tools into a properly grounded outlet before using them.

4. Control the Atmosphere

Controlling the atmospheric conditions in the cleanroom is also important to reduce the chances of an ESD event. You can use Ionization machines to control the electrical charges in the atmosphere. The machine uses a fan to pull the air in the cleanroom into it.

As the air passes through the ionizer, it electrically charges the positive and negative ions connected to the air molecules. The ions spread out into the room and bond to their positive and negative ion counterparts on workbenches, clothing, and other things. This provides an electronically-charged balanced workspace that minimizes the probability an ESD event will occur.

Work With Hallmark Nameplate, An ESD-Safe Manufacturer

If you have any questions about ESD and how Hallmark maintains an ESD-Safe environment to protect the printed circuit boards we make, just give us a call. We have seasoned personnel who can answer any questions you may have about printed circuit boards and our ESD-Safe environment.

Your Complete Guide to a Perfect Screen Printing Process

Our facility, as well as our expertise, allow us to offer screen printing on many materials for nameplates. But what does this process entail? We are here to fill you in on this process, to help you understand why it just might be the best screen printing process for you.

What is Screen Printing?

Screen printing employs the use of a screen (thus the name) upon which a stencil is applied, using that screen to deliver ink to the surface that is to be printed on.

It is used to create graphics and colored logos, with a wide range of color possibilities. Polyester or enamel inks are printed on metal, followed by baked varnishes for added durability.

Screen printing can be used on stainless steel, aluminum, and brass but aluminum is the most common.

Screen-printed nameplates:

  • withstand harsh environmental conditions
  • stands out with full-color designs
  • usually the most cost-effective type of printing

So how does this process work?

What is the Screen Printing Process?

Screen printing is a printing technique whereby a mesh is used to transfer ink onto a substrate, except in areas made impermeable to the ink by a blocking stencil. A blade or squeegee is moved across the screen to fill the open mesh apertures with ink. A reverse stroke then causes the screen to touch the substrate momentarily along a line of contact. This causes the ink to wet the substrate, and be pulled out of the mesh apertures as the screen springs back after the blade has passed.

There are various terms used for what is essentially the same technique. Traditionally, the process was called screen printing, or silkscreen printing, because silk was used in the process prior to the invention of polyester mesh. Currently, synthetic threads are commonly used in the screen printing process.

screen printing process

The most popular mesh in general use, however, is made of polyester. There are also special-use mesh materials, like nylon and stainless steel, available to the screen printer. Additionally, there are also different types of mesh sizes, which will determine the outcome and look of the finished design on the material.

A screen is made of a piece of mesh stretched over a frame. A stencil is formed by blocking off parts of the screen in the negative image of the design to be printed; that is, the open spaces are where the ink will appear on the substrate.

Pre-Press Process

Before printing occurs, the frame and screen must undergo the pre-press process, in which an emulsion is ‘scooped’ across the mesh and the ‘exposure unit’ burns away the unnecessary emulsion leaving behind a clean area in the mesh with the identical shape as the desired image.

The surface to be printed (commonly referred to as a pallet) is coated with a wide ‘pallet tape’. This serves to protect the ‘pallet’ from any unwanted ink leaking through the screen and potentially staining the ‘pallet’ or transferring unwanted ink onto the next substrate.

Next, the screen and frame are lined with tape. The type of tape used in for this purpose often depends upon the ink that is to be printed onto the substrate. These aggressive tapes are generally used for UV and water-based inks due to the inks’ lower viscosities.

The last process in the ‘pre-press’ is blocking out any unwanted ‘pin-holes’ in the emulsion. If these holes are left in the emulsion, the ink will continue through and leave unwanted marks. To block out these holes, materials such as tapes, specialty emulsions, and ‘block-out pens’ may be used effectively.

Precise Ink Application

The screen is placed atop a substrate and ink is placed on top. A floodbar is then used to push the ink through the holes in the mesh.

The operator begins with the fill bar at the rear of the screen and behind a reservoir of ink. They lift the screen to prevent contact with the substrate and then using a slight amount of downward force pull the fill bar to the front of the screen.

This effectively fills the mesh openings with ink and moves the ink reservoir to the front of the screen. The operator then uses a squeegee (rubber blade) to move the mesh down to the substrate and pushes the squeegee to the rear of the screen.

The ink that is in the mesh opening is pumped or squeezed by capillary action to the substrate in a controlled and prescribed amount. That is the wet ink deposit is proportional to the thickness of the mesh and or stencil. As the squeegee moves toward the rear of the screen the tension of the mesh pulls the mesh up away from the substrate (called snap-off) leaving the ink upon the substrate surface.

The Four Color Process

The Four Color Process, or CMYK color printing, is a manufacturing procedure that uses screens and filters to separate a color image into 4 individual color values. This is called color separation. Software is used to control printers that place the four distinct colors into the right areas to produce the correct colors for the design.

screen printing process

These four colors are CMYK :

  • Cyan
  • Magenta
  • Yellow
  • Black

This process uses four plates, one for each color, to create the precise designs that are being asked for. Each different-colored plate is applied one at a time. Precision and accuracy are the keys to creating very detailed and correctly crafted images, copies, and designs.

If there is a misalignment to one color application, the result is a blurry or hazy design. Properly aligned plates will result in a sharp and clear image or copy on your labels and plates.

Key features of this process include:

  • Four standard colors (CMYK) are used all the time
  • Designs are made with the printing of tiny dots at different angles on the surface of the material
  • Considered the most cost-effective method for printing colored designs
  • Cheaper than toner-based printing methods

Ready to get started?

Get High-Quality Screen Printing with Hallmark Nameplate

At Hallmark Nameplate we offer high-quality, high-value screenprinting with excellent turnaround time. We’ve invested in top-quality equipment. That means efficient, cost-effective screen printing for our clients and the best color-matching in the industry.

Screen printing is just one of the many techniques we at Hallmark Nameplate use to create beautiful, high-quality products efficiently and without error. Contact us today and give us the opportunity to enhance your nameplate with our high-quality screen printing process!