60-years-of-experience

60+ Years of Experience

satisfaction-guarantee

Satisfaction Guarantee

short-lead-times

Short Lead Times

Wave Soldering vs Selective Soldering: Perfecting Your Electronic Assembly Process

Should you use the wave soldering process or selective soldering process in electronic assemblies? The answer depends on the intended use of your PCB.

As electronic devices get more complex, so do their electronic assemblies. So, what are the different ways to create a strong electronic assembly and how can you keep up with the more advanced components and their requirements? The answer lies with soldering.

Simply put, soldering is a term that describes a process that uses a metal alloy to create a strong permanent bond between elements in electronic assemblies, such as a circuit board.

In this article, we’ll dive deeper into the world of electronic assemblies and soldering, and learn:

  • What is an electronic assembly
  • Proper ways to create circuit boards
  • Key differences between the wave soldering process vs the selective soldering process

Let’s start by defining the purpose of electronic assemblies and some of their uses.

What is an Electronic Assembly?

Custom electronic assemblies, also known as printed circuit board assemblies, involve mounting components to the wiring of a printed circuit board (PCB).
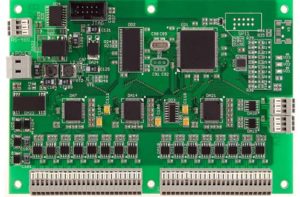
electronic assembly

The PCB is the foundation of electronic devices. A PCB has pathways that connect electronic components to transfer electricity. Additionally, it provides support for your components.

There are two main ways to create circuit board assemblies:

  • Surface Mount Technology
  • Through-Hole Technology

Depending on the type of PCB assembly different soldering processes will be used.

Soldering Processes for a PCB Assembly

There are two main soldering techniques when creating custom printed circuit board assembly:

  • Wave soldering
  • Selective soldering

You may be wondering what these two processes are and how they differ. Keep reading to learn the pros and cons of each.

Key Differences Between Wave Soldering & Selective Soldering

When choosing which process to use for your electronic assembly it is important to understand their differences. Each soldering process has its advantages and disadvantages that can affect the end product.

Let’s begin with what wave soldering is.

What is Wave Soldering?

Traditionally, the most popular solution for electronic assembly manufacturing has been to utilize wave soldering. This process, also known as flow soldering, has been the standard process for many years.

Flow soldering is ideal for projects that only require conventional through-hole components or those with particularly large surface mount components.

The Process

First, you spray a layer of the flux in order to clean the components of impurities.

Then you preheat the board to activate the flux. This also protects the board from thermal shock.

The PCB then passes through a molten wave making an electrical connection between the components and PCB. If you are soldering a double-sided PCB you will need to pass it through twice.

This process is performed in a protective nitrogen area in order to reduce any defects.
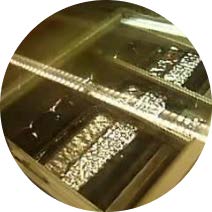
Wave soldering

Pros of Wave Soldering

Wave soldering is perfect for simple soldering where you have a high quantity to do in a short amount of time.

The advantages to using flow soldering include:

  • Easy setup
  • Improved speed
  • Cheaper process

While there are advantages to using the flow soldering process, it also has its disadvantages

Cons of Wave Soldering

While the setup is easy, post-cleanup takes longer because of the molten wave. It also may require additional reworking which, in the long run, can make the process more work.

Additionally, flow soldering requires more material, such as solder, flux, electricity, and nitrogen, to complete the process. Keeping up with the high rate of consumption can become expensive.

Next, let’s explain what selective soldering is.

What is Selective Soldering?

The other process is selective soldering. Selective soldering is a process where you solder individual through-hole components on a PCB using a solder fountain or head that moves to solder from underneath.

This method is becoming more and more common as the industry moves away from the assembly of larger PCBs of the past. Double-sided PCBs have become more common which use smaller components.

The Process

First, apply flux to the components that will be soldered. Then you preheat the board to activate the flux.

Then with an automated nozzle solder-specific components locally on an x-y gantry to the PCB.
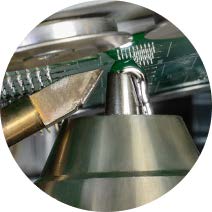
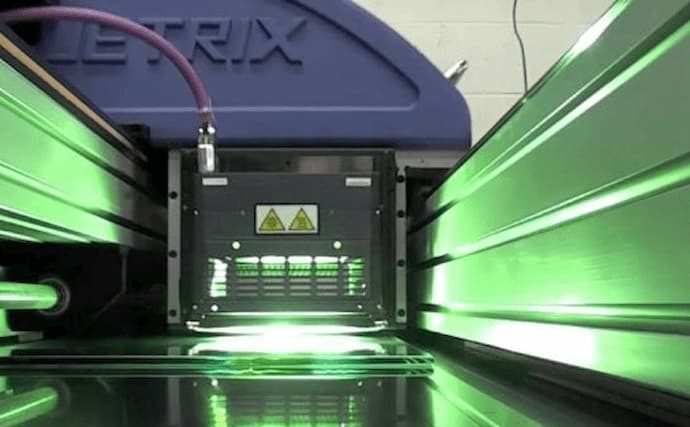
Selective soldering process

Pros of Selective Soldering

Selective soldering is perfect for soldering small components on boards that are densely populated. As each section of the board is soldered individually, selective soldering is far easier to control.

Among other things, this makes it possible to adjust various parameters like thermal profiles, pitch, and component heights.

Other advantages of selective soldering include:

  • Improves reliability of solder joints
  • Removes the need for fluxing all components
  • Less expensive
  • Process optimization

Most importantly selective soldering provides consistency so you can easily reproduce the project.

Selective soldering is perfect for difficult conditions such as:

  • Tall component height – tall components may block the wave from soldering
  • Tight spacing – if a thru-hole component is close to an SMT component then there is not enough room for flow soldering
  • Uneven heating – certain thick metals cannot be heated thoroughly enough to form a solid solder joint with the flow soldering
  • Dence concentration – large connectors close together can make it difficult to reach the pins with wave soldering

As you can see there are a lot of advantages to using selective soldering which is why so many people are beginning to use it more. That being said there are still disadvantages to using selective soldering.

Cons of Selective Soldering

Like flow soldering, selective soldering also has some disadvantages.

For starters, the setup is more complex because it uses unique programming for every board

The soldering process is also more time-consuming than its counterpart and, therefore, is not efficient for producing high quantities.

Nevertheless, selective soldering is great for those who value precision and high-quality end results.
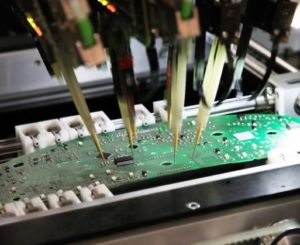
electronic assembly using wave soldering

Create a Durable Electronic Assembly with Hallmark Nameplate

Whether you want to assemble your electronics through wave or selective soldering, Hallmark Nameplate ensures your soldering needs are professionally met.

At Hallmark Nameplate, we provide prototyping during our PCB assembly so you have peace of mind knowing that your electronic assembly exceeds expectations. Furthermore, for precise and efficient soldering, we use an Ersa Selective Soldering SMARTFLOW 2020. Not only that, but we also run several thorough tests including temperature humidity, thermal shock, and vibration testing.

Ready to start your electronic assembly? Our experts are always ready to help. Get in touch with us and we’ll find the right solution to meet your needs.

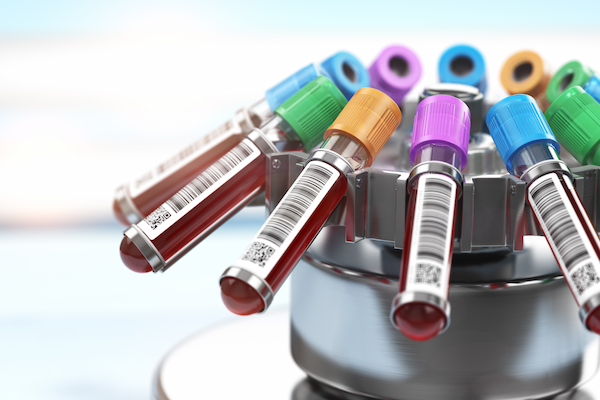
How the Medical Industry Can Benefit From Nameplates and Labels for Medical Equipment

Whether you operate the ER or manage a dentist’s office, you are responsible for the safety of your patients and staff. In fact, the medical industry often requires medical device labels, material specifications, certifications, and strict inspection procedures to ensure the safety of everyone who works alongside you.

Luckily, you can actively mitigate risks and abide by safety protocols through the use of durable, custom medical equipment stickers, barcodes, and labels.

In this article, you will learn everything you need to know about medical equipment labels, nameplates, and overlays and how they can help you reduce the risk of danger and liability.

Labels for Medical Equipment: A Key Component of the Medical Industry

Whether you work at hospitals, laboratories, EMTs, or clinics, you know how important it is to keep your business organized and safe at all times. When you are busy saving lives, the last thing you need to be worrying about is locating the proper button or tracking a sample.

That is why the medical device industry requires nameplates, medical equipment labels, and overlays. These simple medical equipment stickers are used to communicate the proper usage of medical equipment, tools, and substances.

Furthermore, the medical industry also needs:

  • Instructional and warning labels
  • UID nameplates and barcodes
  • Model and serial number nameplates
  • Overlays for their state-of-the-art diagnostic and therapeutic devices

So, how can nameplates, labels, and overlays benefit the medical industry?

Top 4 Benefits of Labels for Medical Equipment

The medical industry always needs to abide by the highest safety standards because you are holding someone else’s life in your hands. That is where nameplates, overlays, and labels come into play.

When you install a nameplate or overlay, such as an instructional or safety warning on your medical device, you instantly help manage the risk of use and make your processes much more efficient.

Keep reading to discover the 4 key benefits nameplates, overlays, and labels for medical equipment can offer your business.

1. Manage and track your assets with medical barcodes

When it comes to the medical industry, your assets and inventory may include important patient samples that you do not want to lose or mix up.

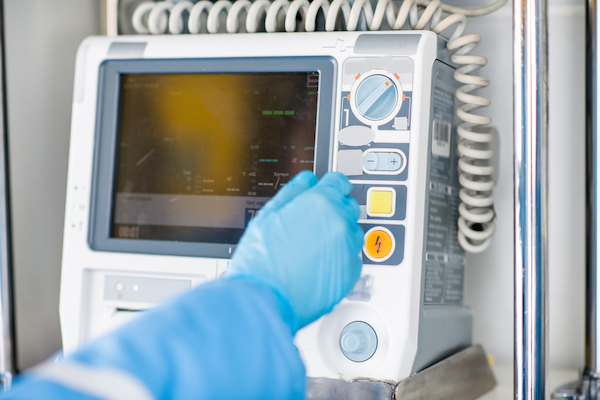
labels for medical equipment

You can add a medical barcode or QR code to products, samples, and equipment in your medical facility to help you access information easily with one quick scan. This can help you trace your assets so there isn’t downtime trying to find them.

2. Reduce risk with safety warning labels and signs

Next, when you are working in the medical industry, there are a lot of risks involved. In some instances, there may be areas of your facility that can be dangerous if someone is not wearing the proper safety equipment.

Adding warning labels or signage can help to eliminate these risks and warn the user of potential harm.

For instance, practical and useful signage in your medical facility may include:

  • Custom door signs for offices
  • Medical office signs
  • Waiting room signs
  • Recovery room signs
  • Therapy & lab signs
  • Procedure room signs
  • Numbered exam room signs
  • Hospital wall signage

With these signs and labels distributed in and around your facility, you will increase both patient and staff awareness and help mitigate safety and liability risks.

3. Help your staff properly operate your medical equipment

While you may have trained your staff on how to properly use all of your equipment, it can be easy to forget the specific requirement during the day-to-day operations. Therefore, add a nameplate or label to your medical equipment with information on usage guidelines, warnings, or restrictions to help your staff.

medical device labels

Keep in mind that improperly using equipment in the medical industry can lead to your employees or patients being injured, or worse. That is why nameplates and medical device labels are so important!

4. Reinforce branding with custom overlays, plates, and labels

Finally, you can use custom branded overlays or labels on your products and equipment to help the end-user better identify your business. This can be done by including your business’s name, your branding colors, or your logo.

Now that you understand the general benefits of using overlays, labels, and nameplates in the medical industry, let’s go into more specific uses.

Importance of Nameplates in the Medical Industry

In the medical field, durable, long-lasting nameplates are critical to the safety and efficiency of anyone who works in such an intricate industry.

Simply put, nameplates, such as medical identification tags, can be used to display warnings, instructions, identification, and branding.

Medical identification tags are particularly useful on medical machines and may include:

  • Warning and instruction tags
  • Barcode and UID nameplates
  • Model Plates and Serial Number Plates

One of the main reasons nameplates are used is to provide critical information.

Primary Uses of Nameplates in the Medical Industry

For starters, a key use of nameplates in the medical field is to identify and provide vital information on medical machines and other devices that may cause harm.

Common information included on nameplates are:

  • Manufacturer’s name
  • Location of manufacturer
  • Model number
  • Serial number
  • Date of manufacture

It is important to choose a material that is durable so none of the important information on your nameplate gets tarnished or scratched.

Next, let’s discuss how you can use overlays in the medical industry.

Importance of Medical Device Overlays

A graphic overlay, also known as a panel overlay, is a critical printed interface on mechanical and electronic assemblies. It allows the user to effectively interact with the device, machine, or equipment.

This top layer visually represents the device’s user interface panel and is the first thing the operator sees. There are various forms, such as a single layer that is backed by adhesive or part of a membrane switch.

These overlays typically include the company name and branding, in addition to product information like IDs and serial numbers, plus instructions for using the device.

Finally, a graphic overlay may also include important safety warnings. This functional user-friendly interface is very important, as it helps define the user experience.

Common Uses of Overlays in the Medical Industry

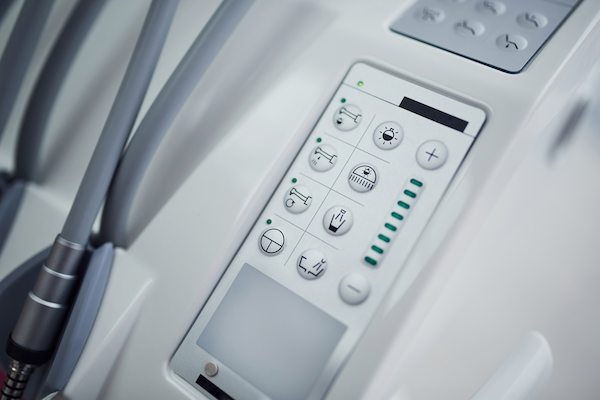
labels for medical equipment

Overlays for medical devices are very important because with one wrong press of a button you can lose someone’s life. Both your employees and your patients need to be able to understand any devices they come into contact with.

All state-of-the-art diagnostic and therapeutic devices need clear overlays. This is especially so for emergency buttons where the user has to be able to recognize it at a glance.

Overlays made out of polyester, polycarbonate, or vinyl protect the devices from any contamination or damage. Many people in the medical industry turn to Polyester overlays because they are the most chemically resistant.

Importance of Medical Device Labels

Important, complex equipment requires labels or medical equipment stickers that can withstand harsh conditions and meet industry specifications. The medical industry often uses labels for asset tracking and safety, using them in clinics and on medical equipment.

The 3 main labels and tags are:

  • Inventory and asset tags
  • Warning labels
  • Branding tags

So, what are their purposes?

Key Uses of Labels in the Medical Industry

Businesses in the medical industry use labels on their medical equipment. Labels share vital instructions and safety warnings as well as provide quality control.

Typically, labels are placed on medical equipment in order to provide the necessary information. They usually contain barcodes, ownership details, manufacturer’s name, serial number, and maintenance requirements.

Once you have decided the purpose of your label, you can begin assessing the factors that go into designing nameplates, overlays, and labels for the medical industry.

Must-Know Design Factors to Create Durable Medical Labels

There are many factors that go into manufacturing the perfect nameplate, label, and overlay for your business. Depending on the purpose of your nameplate or overlay, you may require different materials or certifications.

Keep reading to learn more!

Opt for the Best Material

Durability is very important when choosing materials in the medical industry. Medical devices must be able to withstand fluids and chemicals as well as routine cleaning. Some common, long-lasting materials you can choose include:

Anodized Aluminum – Lightweight yet durable, anodized aluminum is suitable for both indoor and outdoor applications. Known for its corrosion and abrasion resistance and is lighter than other metals. Anodized aluminum can be customized with various colors and designs.

PhotoSensitive Aluminum (MetalPhoto) – MetalPhoto is extremely durable and unaffected by harsh indoor and outdoor conditions. It includes the process of sealing your image under a sapphire-hard anodic layer to protect it.

Polyester (Mylar®) – Polyester, also known as Mylar, is ideal for harsh indoor and outdoor environments. It’s UV resistant, won’t fade in the sun, is non-yellowing, and is electrical resistant. Additionally, it can withstand extreme temperatures, water, abrasion, and chemicals.

Polycarbonate (Lexan®) – Lexan is a polycarbonate resin thermoplastic material that’s transparent, strong, tough, impact-resistant, and temperature resistant. It’s the best material to use where extreme temperatures and widely varying temperatures are a concern. This material is also resistant to scratches, corrosion, chemical abrasion, and water. The material expands and contracts without damaging the material.

Vinyl (PVC) – PVC vinyl, also known as polyvinyl chloride, is very rigid and extremely durable. However, unless it has UV overlaminate protection, it isn’t suitable for outdoor use. Properties of PVC include resistance to moisture and humidity as well as low cost.

Next, when selecting your material, you also want to be aware of any industry-specific standards you need to follow.

Take Note of Certifications and Industry-Standards

When working in the medical industry your facility and equipment may require material specifications, certifications, and strict inspection procedures.

There are several important certifications to note:

ISO 13485International Standard Organization (ISO) 13485 is a certification for medical devices like medical instruments, machines, that are intended for use in the diagnosis, prevention, and treatment of diseases or other medical conditions.
ISO 9001 – This certification is for quality management systems based on procedures related to people, facilities, equipment, training, and services.
Underwriter Laboratories (UL) – certifies security for products ensuring products meet safety requirements
Canadian Standards Association (CSA) – certificate for high-risk products indicating that the product has been tested and meets high standards

Not only do these certifications assure safety but they also build credibility with your customers.

Create Durable Medical Device Labels with Hallmark Nameplate

With extensive engineering and manufacturing expertise, our team at Hallmark Nameplate will work with you to create the best medical equipment nameplates, overlays, and labels for your application. No matter what project you want to work on, we’re here to exceed your expectations!

Contact us to request a free quote and learn more about how we can help you make your medical business safe and efficient.

Membrane Switch vs. Mechanical Switch

When you are designing and constructing a custom electronic device, it is very important you choose the right switches. This is an often overlooked component of building a reliable and effective device. You have two main choices in this area. You can go with membrane switches, which are switches that have the whole assembly sealed. You can also go with mechanical switches, which are the switches that are not totally sealed. Which of these options is right for you depends on your situation and the device you’re building. To learn more information about the membrane switch vs mechanical switch, read on.

Benefits of Membrane Switches

The most obvious benefit of membrane switches is is that they’re sealed from the outside environment. As you might imagine, this makes them more reliable. The fact these switches are sealed prevents water, dirt, and debris from getting into the little cracks around the switch. This is a common problem with mechanical switches, and it completely avoided with membrane switches. One other benefit of membranes switches is that they’re easy to clean because there is no gap around the switch. All you have to do is wipe off the switch, you don’t have to worry about getting into the little gap and cleaning out anything that might have fallen into there.

Drawbacks of Membrane Switches

There are a few drawbacks of membrane switches. One of these is that they are more expensive. Exactly how much more expensive depends on the device that the switch is for, the switch itself, and several other factors. It may not be much more expensive, but the difference may be enough to give you pause if you are planning on producing this device on a large scale. One related drawback of membrane switches that they’re more labor-intensive to make. Of course, this means they are more expensive as noted above. However, this also means that they take a little bit longer to make. Similar to the greater expense, this drawback is greatly magnified if you’re producing their device on a large scale.

Benefits of Mechanical Switches

Mechanical switches may seem like they are less high-tech, but this is not necessarily true. One definite benefit they have over membrane switches is that they are cheaper. They may only be $0.05 cheaper per switch, but if you’re building a complex device with a lot of switches this can add up. This is especially true if you are making many of these devices. Any savings that you get on making the device can improve your bottom line. Mechanical switches are also quicker to make. This means you can make more products in a specified length of time. This, of course, can lead to more profits in the long run. How much quicker mechanical switches are to make depends on the design of the switch and on how the device needs to be constructed.

Drawbacks of Mechanical Switches

There are a couple of drawbacks inherent in using mechanical switches. They are noticeably harder to clean. If you are trying to clean a device that has mechanical switches, you need to get into the gaps around the switch in order to properly clean the device. If you don’t, dirt and debris make it into these little gaps and eventually cause the switch to malfunction. They may even get into the device itself and break the entire thing. On a related note, devices with mechanical switches are more likely to get damaged by conditions. This drawback may be especially evident if your device needs to stay outside. If it is situated in an area with a great deal of moisture, this could be a serious problem that may lead to the malfunction of the device in short order.

Figuring Out Which Switch is Right for You

If you have just read the previous information and are still not quite sure whether you should choose membrane switches or mechanical switches, don’t be too worried about this. You can always contact our company and our highly trained and experienced engineers will help you figure out which is right for your application. All you need to do is give them all these specifications and details of the device and the situation in which it will be used. They can take all this information and give you an educated opinion. Of course, the final decision is totally up to you.

7 Effective Tips to Help You Design a Successful Safety Warning Label

As of November 2020, 2.8 of every 100 full-time workers were injured at their workplace. With that being said, it’s common knowledge that hazards exist within almost every industry and business environment.

In order to protect your business and any parties involved, use a safety warning label, such as a machine warning label or a warning decal, wherever caution should be exercised.

In this blog, learn what a safety warning label is and its major benefits to the workplace. Then, discover 7 helpful tips that will allow you to create effective warning labels for your business.

First, let’s begin with the basics.

What is a Safety Warning Label?

You probably already know that companies have a duty to warn consumers and employees about the possibility of injury while using a specific product or machine. That’s where safety warning labels come into play.

safety warning label


Safety warning labels are the labels placed on many products that alert consumers about the dangers of using the specific product beyond its intended use. Warning labels can be placed on the product itself, as a nameplate, or be provided with the product in packaging materials.

Due to product liability law, there are many things that must be stated to absolve a company of any wrongdoing if a product was not used as intended, or if the consumer did not heed the information on the warning label. Therefore, it is up to the manufacturer to decide which type of label is best for their product and for the consumers who will be using them.

3 Common Types of Safety Warning Labels

For starters, there are 3 main types of safety warning labels. These are specific to their uses and have different components and requirements.

Keep reading to learn more about the types of warning labels you may encounter.

1. Facility and Building Warning Labels

This is the most common type of safety warning label. This type of safety label warns people of common hazards that might exist in and around your property.

2. Emergency and Fire Exit Labels

Next, fire safety labels are an important part of any business’s fire prevention equipment. Warning labels should always be designed in such a way that they are very noticeable, with large and brightly colored types.

These should feature not only type but also directional devices so that people understand where the exits are that the signs make them aware of.

3. Machine Warning Labels

Finally, it is important that any machinery with even the slightest chance of harming someone be labeled as a potential hazard. This includes any equipment that is heavy, mechanical, electrical or has the potential to give off heat.

These types of labels should be placed so that they are easily seen by anyone who is either using the equipment or even just walking past it.

So what are the benefits and purposes of these labels?

Major Benefits of Safety Warning Labels

From protecting your customers and employees to saving money, safety warning labels are used for several purposes and offer many benefits. For instance, some benefits include:

  • Reduce the chances of accidents and injury – Whether a person is working in a given area or is simply a visitor, they should be aware that the potential for harm is present. The chances of avoiding payouts of workman’s compensation and damages from lawsuits are substantially lessened with the use of labels.
  • Compliance – Warning labels and safety decals are required by OSHA. As a result, you should always label appropriate hazards in order to stay in compliance with local, state, and national requirements.
  • Locating safety equipment – What good is having a fire extinguisher and other safety equipment if you can’t readily find it? A safety label can make everyone aware of the location of a piece of equipment that might otherwise be overlooked in the event of an emergency.
  • Training and Orientation Benefits – Safety labels are an excellent way to make new employees and others aware of where safety equipment is located and how it is used to its greatest advantage. This is especially important for someone who might not be familiar with the dangers of your business areas.

In order to achieve the best results from your labels, you need to understand how to properly use the elements in a label.

Helpful Visual Elements That Benefit Safety of Use

Obviously, the better the signage is, the better the chances are that they will be seen and danger averted. There are 3 main visual elements you can use on your labels in order to help you deliver your message.

These visual elements include:

  • Signal word – this is the one or two-word headline that captures attention
  • Symbols – these are the pictograms you use to visually show your warning
  • Word message – here is where you better explain the hazardous situation

In order to get the most out of your label, you need to know how to properly use these elements and create an effective design.

custom safety warning labels

7 Tips for Creating Effective Safety Warning Labels

Your warning label isn’t helpful if your user cannot understand what it is trying to say. By following these 7 tips, you can create an effective safety warning label that protects your customers, employees, and your business.

1. Write Clear and Concise

In order to be sure that your warning is fully understood, it is recommended to write your warning clearly and concisely.

It is best to avoid any ambiguous or complicated wording and write in an active voice. You want to keep your message short and to the point so there aren’t any misunderstandings.

Remember to make sure everyone who may use the product or machine has access to the information on the label. This can be done by offering the label in other languages such as Spanish and French.

2. Select Signal Words

Your signal word is your headline that captures attention. There are several types of signal words you can use varying in severity. These include:

  • Danger – The highest level of severity only meant for extreme situations that lead to death and serious injuries
  • Warning – Warnings are for hazards that can end in death or injury
  • Caution – Indicates that the situation can cause minor injuries
  • Notice – This is for non-dangerous instructions and warnings
  • Safety Instructions – Indicates that there are specific safety instructions

Once you choose your headline, you should pick a correlating symbol.

3. Use Pictograms & Symbols

You’ve probably heard the saying that a picture is worth a thousand words. Well the same goes for pictograms and symbols on safety warning labels!

Pictograms are one of the best ways to ensure everyone is aware of any hazards. Not only can they give a message at a glance but they are also universal and surpass language barriers.

When adding symbols, you want to make sure they are consistent and their meaning is clear. If there is any possibility of the image being misunderstood, you should follow it with a reinforcing message. This leads us to our next tip.

4. Include a Helpful Message

When an image isn’t enough information, include a message that explains what the warning is for and how you can work to avoid the hazard.

You can also include a message that explains any possible consequences of not listening to the warning. This helps motivate viewers to listen and understand the severity of their actions.

5. Pick a Durable Material

Next, your warning label is important to the safety of your customers and employees so you want to make sure it is durable. With that being said, you definitely don’t want your message to fade or get scratched.

Therefore, you should always choose a tough material that can withstand outside elements and chemicals.

While creating your safety warning label, it is important to understand and comply with standards that are set.

6. Choose the Best ISO Label Format

When it comes down to designing your safety warning label, you should also be aware of ISO (International Organization for Standardisation) label formats. For instance, common symbol-only styles include:

custom safety warning labels

Yellow – Triangular warning signs to identify any hazards that can lead to injury
Blue – This circular mandatory action sign explains actions to take to avoid any hazards and stay safe. Typically contains white symbols in the blue circle.
Red – This label has a red circle with a slash across it. It is a prohibition label that shows you what actions are prohibited to avoid any danger.

Staying consistent with these styles can help improve users’ understanding and make it easy for those to notice warnings at a glance. Furthermore, compliance with these standards not only protects you but builds credibility with your customers.

Speaking of compliance…

7. Comply with Safety Warning Standards

To avoid liabilities and getting sued, you have to not only comply with state and federal regulations but also standards set by the following organizations. Here’s what you need to know.

American National Standards Institute (ANSI) – ANSI gives guidelines for creating safety signs for products inside the U.S. and Canada. Most warning labels use ANSI warning header for equipment warning labels, high voltage warnings on electrical utilities, and personal protective equipment. Using the pictograms you can easily grab attention and include clear consequences and avoidance statements.
Occupational Safety and Health Administration (OSHA) – OSHA danger headings are used on many danger labels for machinery warnings and Arc flash warnings. This type of label is more traditional and therefore has more familiarity amongst workers.
International Organization for Standardization (ISO) – ISO provides guidelines for safety labels that are typically used internationally, outside of the U.S. and Canada. They have symbol-only signs with three different styles for different purposes.

With these top 7 tips in your tool belt, it’s time to craft a custom safety warning label for your business.

Design the Perfect Safety Warning Label With Hallmark Nameplates

Whenever employees, guests, and others are on your property, you should make every effort to make sure that they are safe and know how to protect themselves when there is an emergency. Safety labels that are correctly made and appropriately placed are excellent for this purpose.

At Hallmark Nameplate, we have over 60 years of experience creating effective safety warning labels and know exactly what your project needs. We will work to not only meet your expectations but exceed them.

Ready to get started on creating your labels? Request a free quote today!

How an Architectural Label Can Mitigate Risk in the Architecture & Construction Industry

Here’s something we can all agree on: When designing and constructing buildings, there are always risks involved, especially when it comes to the use of complex equipment. So, how do you mitigate the risk of use? This is where architectural labels, overlay, or nameplate comes into play.

In this article, discover how the building industry can benefit from overlays, labels, and nameplates and learn how you can apply them in the field.

First, let’s talk about the common uses of architectural and construction overlays, labels, and nameplates today.

Key Uses of Nameplates and Labels in the Construction Industry

Whether you are sitting behind a drafting table or working in the construction field, you are likely using complex tools and equipment. Because of this, the building industry requires overlays, nameplates, and tags such as:

  • Inventory and asset tags for design and drafting equipment
  • Instructional nameplates for equipment
  • Warning nameplates for dangerous areas
  • Custom graphic overlays for mechanical and electronic assemblies
  • Branding tags for drafting plan cases

Next, applications commonly include engineering design plans for buildings, office spaces, landscapes, residential homes, and institutional spaces.

Now, you may be wondering what the benefits are of using an architectural label or nameplate. Keep reading to find out.

Major Benefits of Architectural Labels

With any industry, there are benefits that come with using custom nameplates, overlays, and labels. When it comes to the architecture and construction industries, in particular, a label or nameplate specifically designed for each product, tool, or piece of equipment can have huge benefits for both the user and the business as a whole.

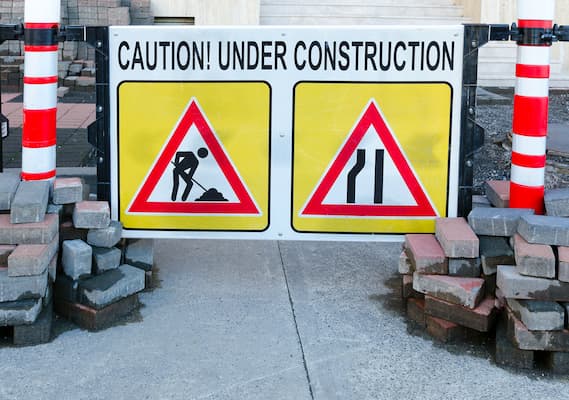
construction warning labels and architectural labels

These benefits include:

  • Increased organization – track and manage your construction equipment with specialized barcodes so you do not have to fuss with downtime.
  • Improved sales – with an architectural label on your side, you can heighten your perceived value and brand awareness, which often leads to more sales.
  • Better communication – users will gain access to better information on proper usage of equipment and products. With the manufacturer’s contact information included, users can seek help when necessary.
  • Safer environment – Proper safety and warning labels keep your employees, customers, and your business safe and minimize risk.

Now that you understand the general benefits of using overlays, labels, and nameplates in the architecture and construction industries, let’s go into more specific uses.

Graphic Overlays in Architecture & Construction

When working in architecture and construction, you will come in contact with a lot of intricate equipment that requires special care and use.

As heavy machinery can pose a potential workplace risk and increased liability for organizations, interfaces must be robust and easy to read, as well as intuitive. That is where graphic overlays come into play.

How Can a Graphic Overlay Benefit the Construction Industry?

A graphic overlay, also known as a panel overlay, a critical printed interface on mechanical and electronic assemblies allows the user to effectively interact with the device, machine, or equipment.

This top layer visually represents the device’s user interface panel, and it is the first thing the operator sees. There are various forms, such as a single layer that is backed by adhesive or part of a membrane switch.

These overlays typically include the company name and branding, in addition to product information like IDs and serial numbers, plus instructions for using the device. A graphic overlay may also include important safety warnings. This functional user-friendly interface is very important, as it helps define the user experience.

Common Uses of Architectural Overlays

Typical uses of graphic overlays include:

  • Instructions – when using expensive, heavy-duty machinery there is no such thing as a small mistake. Eliminate risk by including instructions that explain to the user how to properly operate the equipment.
  • Safety – working in the field, safety is a major concern. When your controls aren’t clearly visible to the user, for instance, emergency stop buttons, it can put them at risk.
  • Durability – adding an overlay to your construction equipment can help to increase their lifespan. This is extremely helpful in the field where your equipment has to hold up against harsh conditions.
  • Product Warning – overlays and their design help increase the visibility of equipment and facility warnings.
  • Brand Recognition – using custom branded overlays on your products and equipment can help the end-user better identify your business. This can be done by including your business’s name, your branding colors, or your logo.

Now that you know all about graphic overlays, let’s talk about the key purpose of an architectural label.

Labels in Architecture & Construction

Machinery and heavy-duty equipment require labels that can withstand harsh conditions and meet industry specifications. The architecture and construction industry often use labels for asset tracking and safety, using them in the field and on equipment.

The 3 main labels and tags are:

  • Inventory and asset tags
  • Warning labels
  • Branding tags

architectural labels

These tags are added to drafting tables, tools, cases, machinery, and throughout the construction field.

So, what are their purposes?

Key Purposes of Architectural Labels?

Businesses in the architecture and construction industries use labels to facilitate their building design and construction. Labels share vital instructions and safety warnings as well as provide quality control.

Typically, labels are placed on architectural tools and construction equipment in order to provide the necessary information. They usually contain barcodes, ownership details, manufacturer’s name, serial number, and maintenance requirements.

Once you have decided the purpose of your label, you can begin to select the material you want to use.

Common Materials for Architectural Labels

To start, there are 2 main types of materials you can select for your labels. These include:

Polyester (Mylar®) – Polyester, also known as Mylar, is ideal for harsh indoor and outdoor environments, since it’s UV resistant, won’t fade in the sun, is non-yellowing, electrical resistant, and can withstand extreme temperatures, water, abrasion, and chemicals.

Polycarbonate (Lexan®) – Lexan is a polycarbonate resin thermoplastic material that’s transparent, strong, tough, impact-resistant, and temperature resistant. It’s the best material to use where extreme temperatures and widely varying temperatures are a concern. This material is also resistant to scratches, corrosion, chemical abrasion, and water, and it expands and contracts without damaging the material.

Nameplates in Architecture & Construction

Nameplates are critical to the safety and efficiency of anyone who works in these intricate industries. One of the main types of plates used in architecture and construction are builder’s plates.

These typically can be found on:

  • Bogies
  • Construction equipment
  • Rolling stock
  • Automobiles and other transportation
  • Household appliances
  • Bridges

Nameplates provide critical information.

Common information included on nameplates are:

  • Manufacturer’s name
  • Location of manufacturer
  • Model number
  • Serial number
  • Date of manufacture

Now that you have a better understanding of how you can use nameplates in the architecture and construction industries, we will discuss choosing the right materials.

Common Materials for Architectural Nameplates

Along with Polyester (Mylar®) and Polycarbonate (Lexan®), other durable materials you can choose for your nameplates include:

Stainless steel – it is durable in high temperatures and harsh chemicals. Stainless steel is also more sanitary than other materials because bacteria does not adhere to the metal and it is easier to clean.

Aluminum – this is an ideal material for architectural and construction nameplates because it is durable, lightweight, scratch-resistant, and cost-effective. It can stand up to harsh weather as well as various chemicals.

Vinyl (PVC) – PVC vinyl, also known as polyvinyl chloride, is very rigid and extremely durable. However, unless it has UV overlaminate protection, it isn’t suitable for outdoor use. Properties of PVC include resistance to moisture and humidity as well as low cost.

How to Choose the Right Manufacturing Process for Nameplates

Once you’ve selected the material you are going to use, it’s time to decide which manufacturing process you want to go with.

architectural labels

The most common process for architectural nameplates include:

Embossing – this creates raised numbers and letters in metal and is very durable with enhanced legibility.
Screen Printing – using colored ink your design is printed on the top layer of your metal surface. This process is recommended for projects that do not have to withstand harsh conditions, like warning signs.
Doming – custom domed nameplates have a 3D effect that stands out to create a strong brand design. This process is not recommended for outdoor use because extended sunlight exposure can cause damage to the underlying print.
Photo Anodization – During this process, your design is placed under a layer of aluminum to withstand extreme temperatures.

Choosing the right material and process can be tricky. Avoid the headaches by working with a manufacturing facility that has years of experience in the architectural and construction industry.

Create The Perfect Architectural Label, Overlay, or Nameplate with Hallmark Nameplate

At Hallmark Nameplate, we offer a full range of materials, thicknesses, finishes, adhesives, and special processes to meet the demands of the architecture and construction industries.

With extensive engineering and manufacturing expertise, we work with you to create the best nameplates, overlays, and labels for your application.

Ready to create the perfect architectural label for your business? Get a FREE quote to get started.